Thursday, August 4, 2022

Skazka Code Complete

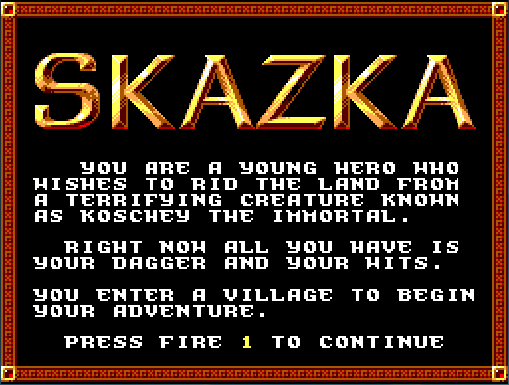
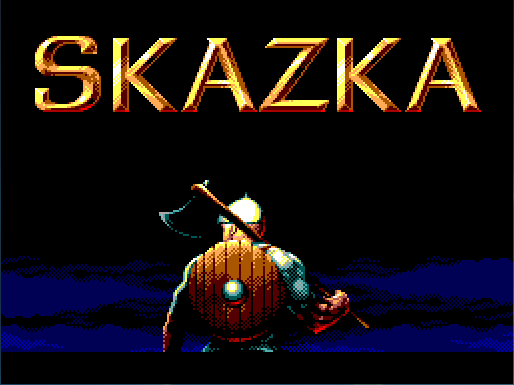
Skazka is a Slavic RGP Adventure game originally written in BASIC for Sega SC-3000 and posted to SC-3000 Survivors Facebook group. The source code is now ported to C using devkitSMS for the Sega Master System.

Let's check it out!

Note: Skazka development based on devkitSMS Programming Setup and devkitSMS Programming Sample.
Download source code here.


Instructions
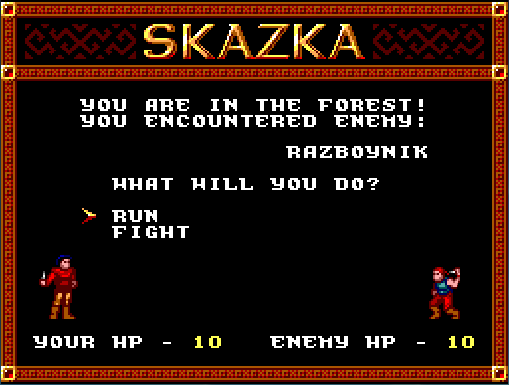
Skazka captures the core mechanics of old school RPG experience: Kill monsters | level up | upgrade gear. There are 5x different enemies in increasing order: Razboynik, Hungry Wolf, Kikimora, Leshy, Baby Yaga. Defeat final boss Koschey to beat the game!

Tools
Here is a list of Tools and frameworks that were used in the development of this project:
 KEY  VALUE
 Programming  devkitSMS
 Compiler  sdcc 3.6.9
 Assembler  WLA-DX
 IDE  Visual Studio 2015 / Visual Studio Code
 Languages  C / Z80
 Graphics  BMP2Tile 0.43 / BMP Converter / GIMP 2
 Music  pcmenc / vgm2psg
 Emulators  Emulicious / Fusion / Meka
 Debugger  Emulicious Debugger

ROM Hacking
You can hack this ROM! Download and dump Skazka into Hex Editor, e.g. HxD, and modify bytes:
 ADDRESS  VARIABLE  DESCRIPTION
 0x019E  Delay  Used to speed through any game delay.
 0x019F  Invincible  Non-zero value enables invincibility.
 0x01A0  Current XP  Non-zero sets current experience pts.
 0x01A1  Current HP  Non-zero sets default healthy points.
 0x01A2  Set Gold  Non-zero sets current gold available.
 0x01A3  Set Weapon  Set value to 1 or 2 for stock else 0.
 0x01A4  Set Armor  Set value to 1 or 2 for armor else 0.
 0x01A5  Add Life  Set value to 1=Life otherwise 0=None.
 0x01A6  Village Talk  Set value to 1=repeat villagers talk.
 0x01A7  Music Off  Set 0=Music to play otherwise silent.
 0x01A8  Sound Off  Set 0=Sound to play otherwise silent.

Hints
  • Try to buy weapon "Sword" or armor "Tegilay" with your initial gold before entering any forest fights.
  • After completing each forest fight, ensure you "Rest" at the main screen to replenish all health points.
  • In the shop when you buy items you already have then will be deducted unconditionally so be aware!
  • Get "+1 Life" just in case you lose a fight or the final boss battle so you do not have to restart game.
  • Maximize HP + XP + get the best weapon "Axe" and best armor "Kolchuga" before fighting the boss.
  • Fight boss when you have > 60 XP because your weapon and armor may be slightly more powerful!

Cheats
  • On title screen, hold fire2 to skip intro music. Same applies on boss and over screens.
  • On title screen, hold fire2 after intro music completes to reveal hidden credits screen.
  • On stats screen, move joystick left or right to skip over the flashing arrows indication.
  • In Easy mode forest screen, press fire2 to "Run away" without risking losing any HPs.

Debugging
  • On Windows you can debug the source code directly from in Visual Studio Code after pressing F5.
  • On Linux you can debug source code directly from Visual Studio Code but launch Emulicious first.

Credits
Extra special thanks to sverx for the devkitSMS. Plus StevePro Studios would like to thank Calindro all for his 24/7 Tech Support. Plus shout out to Mojon Twins na_th_an in which I found lots of some cool sound effects.

Update
Skazka V1.0 was initially a text-based RPG adventure game. However, after collaboration with Kagesan from SMS Power!, graphics were added for all screens for V2.0 which is the most up-to-date version of the game.


Summary
Despite the fact that Skazka was a simple text-based RPG adventure with limited game play, the cool aspect was collaborating with original developer and working together to port the game to the Sega Master System.

Skazka was entered in the SMS Power! 2022 competition to connect the Sega SC-3000 Facebook group and the SMS Power! community with the goal to spread Sega 8-bit preservation and fanaticism. That's awesome!

Monday, July 4, 2022

devkitSMS Programming Sample V

In the previous post, we checked out devkitSMS Programming Setup II. The devkitSMS provides tools and code to support many homebrew development projects for the Sega Master System and Sega Game Gear.

The latest version of the devkitSMS requires an updated version of Small Device Cross Compiler SDCC 4.x and supports new and updated features including the ability to page both code and content transparently.

Let's check it out!

Software
Follow all instructions from the previous post: this documents how to setup the pre-requisite software.
Note: ensure you have downloaded and installed the devkitSMS and Small Device C Compiler [SDCC].

Also ensure that pcmenc is installed in the SDCC bin folder as this utility is used to play WAV audio files.

Demo
All demos in this devkitSMS programming sample are based on the simple Hello World program the previous post that utilizes Visual Studio 2015 on Windows but can be deployed cross platform on Windows and Linux.

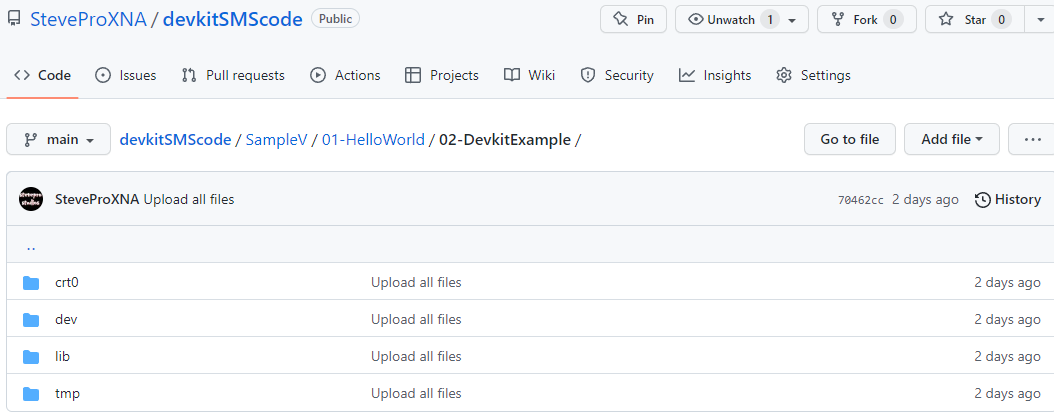
Create folder C:\DevkitExample. Create the following sub-folders: crt0, dev, lib, tmp. Note: all content now preferred to reside under content sub-folder beneath the main dev folder. All content also built using scripts.


Development
Launch Visual Studio 2015. File | New | Project... | Visual C++ | Win32 | Win32 Project

 Name:  Game
 Location:  C:\DevkitExample\dev
 Create directory for solution  UNCHECKED
OK

 Application type:  Console application
 Additional options:  Empty project CHECKED
Finish

Ensure Visual Studio 2015 is configured as per instructions here to automate build process from Ctrl+1 hot key. Create folders beneath dev for .vscode and devkit. Import all code from here including build the scripts.

main.c
#include "main.h"
void main( void )
{
  devkit_SMS_init();
  devkit_SMS_setSpritePaletteColor( 0, devkit_RGB( 3, 3, 3 ) );
  devkit_SMS_displayOn();
  for( ;; )
  {
    devkit_SMS_waitForVBlank();
  }
}

Graphics
Follow all instructions from the previous post to download and install BMP2Tile utility to convert graphics into Sega Master System format. Download new gfxcomp_stm.dll STM compressed format to output directory.

Splash
Here is an example of background tiles that will exhaust the full 256 x 192 resolution e.g. the Splash screen:

Follow the same settings as per here but this time use this script to automate the corresponding formatting:

build.bat
bmp2tile.exe raw/splash.bmp ^
  -savetiles "splash (tiles).psgcompr" -removedupes -nomirror -planar -tileoffset 128 ^
  -savetilemap "splash (tilemap).stmcompr" ^
  -savepalette "splash (palette).bin" ^
  -fullpalette -exit

 Tiles:  Remove duplicates  Checked
 Tiles:  Planar tile output  Checked
 Tilemap:  Use sprite palette  Unchecked
 Tilemap:  In front of sprites  Unchecked
 Palette:  Output hex (SMS)  Checked

Opaque
Candy Kid, which is a Pacman clone, uses opaque background tiles to obscure the main sprite as he goes thru the exits. This technique renders a white 16x16 tile but uses sprite palette bitwise OR with tile priority.

tile_manager.c
static void draw_tile_priority( unsigned char offset, unsigned char x, unsigned char y )
{
  unsigned int priority = devkit_TILE_PRIORITY() | devkit_TILE_USE_SPRITE_PALETTE();

  devkit_SMS_setNextTileatXY( x + 0, y + 0 );
  devkit_SMS_setTile( ( *game_tiles__tilemap__bin + offset + 0 ) | priority );
}

IMPORTANT: the sprite palette color in this example must be black to match background despite white tiles.

Tools
In previous years, Gimp was used to convert graphics as Indexed [16] mode to meet the 4bpp Sega Master System compatible requirements. However, paint.net is great to output PNG files for BMP online converter:
 Color:  4 (indexed)
 With rows direction:  Bottom - Top (default)
 Quantization equal to:  8
 Using dithering:  No


Scrolling
Scrolling in video games involves moving graphics across a display, either horizontally and/or vertically such that the layout does not change but rather moves the view across as an image larger than the whole screen.

Horizontal scrolling was very popular for action, run-and-gun and shoot/beat 'em up games whereas vertical scrolling was used in top down shooters. The devkitSMS tutorial has both vertical and horizontal examples:

Horizontal
Here is the devkitSMS tutorial horizontal scrolling "Ice Hockey" example using the SMS_loadTileMap() API.


scroll_manager.c
void engine_scroll_manager_update_right( unsigned char delta )
{
  unsigned char *src = NULL;
  unsigned char ytile = 0;
  unsigned int index = 0;
  const unsigned int size = 2;

  unsigned int x = 0;
  unsigned char y = 0;

  if( scrollRightDivided8 < scrollWidth )
  {
    scroll -= delta;
    scrollRight += delta;
    scrollRightDivided8 = scrollRight / 8;
    devkit_SMS_setBGScrollX( scroll );

    if( ( scrollRight % 8 ) == delta )
    {
      for( ytile = 1; ytile < Y_TILE_MAX; ytile++ )
      {
        x = X_TILE_MAX + scrollRightDivided8;
        y = ytile - 1;
        index = ( ( BG_TILE_WIDTH*ytile ) + ( X_TILE_MAX + scrollRightDivided8 ) ) * 2;
        src = ( void * ) &hockey__tilemap__bin[ index ];
        devkit_SMS_loadTileMap( x, y, src, size );
      }
    }
  }
}

Vertical
Here is the devkitSMS tutorial vertical scrolling "Marilyn" [MM] example using the SMS_loadTileMap() API.


scroll_manager.c
void engine_scroll_manager_down()
{
  struct_scroll_object *so = &global_scroll_object;
  unsigned int index;
  unsigned int y;

  if( so->scroll < so->height )
  {
    so->scroll++;
    devkit_SMS_setBGScrollY( so->scroll );

    if( ( so->scroll % 8 ) == 0 )
    {
      y = ( 24 + ( so->scroll / 8 ) ) % 28;
      index = ( 24 + ( so->scroll / 8 ) ) * 32 * 2;
      devkit_SMS_loadTileMap( 0, y, ( void * ) &MM__tilemap__bin[ index ], so->size );
    }
  }
}

Vertical II
Here is another vertical scrolling example which prefers SMS_setNextTileatXY() after loading all the tiles.


map_manager.c
static void draw_map_row()
{
  struct_map_object *map_data = &global_map_object;
  unsigned char i, j;
  unsigned char y;
  unsigned char *map_char;
  unsigned int base_tile, tile;
  unsigned char buffer[ 16 ];

  decompress_map_row( buffer );
  for( i = 2, y = map_data->background_y, base_tile = 256; i; i--, y++, base_tile++ )
  {
    devkit_SMS_setNextTileatXY( 0, y );
    for( j = 16, map_char = buffer; j; j--, map_char++ )
    {
      tile = base_tile + ( *map_char << 2 );
      devkit_SMS_setTile( tile );
      devkit_SMS_setTile( tile + 2 );
    }
  }
}

PCM Samples
The Sega Master System is able to play high quality Pulse-Code Modulation [PCM] samples with the pcmenc tool built by Maxim from the SMS Power! community which means WAV files can be converted and played.

Single Bank
Ensure the pcmenc executable currently lives in ~/SDCC/bin folder and accessible from $PATH. Launch the terminal and execute the following command to convert an input "test" WAV file to pcmenc compatible file:
 if exist "SoundFx.wav" pcmenc -rto 1 -dt1 12 -dt2 12 -dt3 423 SoundFx.wav

This assumes that the converted WAV file will be less than 16KB; the maximum size for Sega Master System bank. If not then the WAV file will need to be converted to multiple WAV files + converted [example below].

Here is an example of converting an input WAV file using pcmenc to be SMS compatible for code integration.
Contains the engine code to init and play the converted WAV file as PCM sample on the Sega Master System.

sample_manager.c
void engine_sample_manager_init( const void *psginit );
void engine_sample_manager_play( const void *sample );

riff_manager.c
Public API that game code will call as wrapper around the sample manager to actually play the PCM sample.

IMPORTANT:
I've found that is usually safest to init the riff manager before playing each riff to avoid unwanted noise!

Multiple Banks
When the converted WAV file is greater than 16KB then use Audacity to convert the riff to multiple WAV files. Download, install and launch Audacity. Open WAV file. Divide into multiple smaller files using these settings:

 Project Rate (Hz)  44100
 Snap To  Off
 Selection Start  000,000,000 samples
 Length CHECKED  000,050,000 samples
 Audio Position  000,000,000 samples

Hit Ctrl+B | Enter "01". Repeat as per number of banks required at 50,000 samples intervals for example:
 Riff 01  Selection Start  000,000,000 samples  Length CHECKED  000,050,000 samples
 Riff 02  Selection Start  000,050,000 samples  Length CHECKED  000,050,000 samples
 Riff 03  Selection Start  000,100,000 samples  Length CHECKED  000,050,000 samples
 Riff 04  Selection Start  000,150,000 samples  Length CHECKED  000,050,000 samples

File menu | Export Multiple. Choose export location | Export | OK. Execute the following script to convert:
if exist "01.wav" pcmenc -rto 1 -dt1 12 -dt2 12 -dt3 423 01.wav
if exist "02.wav" pcmenc -rto 1 -dt1 12 -dt2 12 -dt3 423 02.wav
if exist "03.wav" pcmenc -rto 1 -dt1 12 -dt2 12 -dt3 423 03.wav
if exist "04.wav" pcmenc -rto 1 -dt1 12 -dt2 12 -dt3 423 04.wav

Finally, rename the *.wav.pcmenc files to more code friendly names and copy the files to parent banks folder with each *.wav.pcmenc file in its own bank. Use this utiltiy to automate this task and generate the scripts.

Invoke the riff manager similar to single bank example except iterate thru all banks that are required to play riff. The only current drawback with this technique is the main thread blocks as the riff plays synchronously!


Banked Code
SDCC 4.x supports banked code which means it is now possible to page in and out code in a transparent manner. The banked code should be written in separate source files that get allocated in separate code banks. To summarize, banked code means that total code will not be restricted to 32KB maximum size.


Method
1. Put all banked code in separate source files marking banked functions using __banked SDCC keyword.
 banked_code_1.h  banked_code_1.c
 #ifndef _BANK_1_H_
 #define _BANK_1_H_

 int banked_code_1() __banked;

 #endif//_BANK_1_H_
 #include "banked_code_1.h"

 int banked_code_1() __banked
 {
 	return 1;
 }

2. Compile each banked code source file into a specific separate code segment as part of the build script.
 sdcc --debug -c -mz80 --codeseg BANK1 banked_code_1.c
 sdcc --debug -c -mz80 --codeseg BANK2 banked_code_2.c
 sdcc --debug -c -mz80 --codeseg BANK3 banked_code_3.c

3. Use the newly provided crt0b_sms.rel as the first module into your linker call instead of crt0_sms.rel.
4. Instruct the linker to place the banked code at address 0x4000 + the virtual address of the bank which will be calculated as bank number * 2^16 i.e. code segment BANK1 at 0x14000, BANK2 at 0x24000 etc.
 sdcc --debug -o output.ihx -mz80 --no-std-crt0 --data-loc 0xC000 \
 -Wl-b_BANK1=0x14000 \
 -Wl-b_BANK2=0x24000 \
 -Wl-b_BANK3=0x34000 \
 ../crt0/crt0b_sms.rel \
 ../lib/SMSlib.lib \
 main.rel \
 banks/banked_code_1.rel \
 banks/banked_code_2.rel \
 banks/banked_code_3.rel \

5. Finally use the new makesms tool to convert the ihx output to sms format instead of the ihx2sms tool.
 makesms output.ihx output.sms


Summary
Armed with all this knowledge, we are now in an excellent position to upgrade any existing game projects for Sega Master System to latest version of devkitSMS on SDCC 4.x built cross platform for Windows and Linux!

Saturday, June 4, 2022

devkitSMS Programming Setup II

In 2017, we checked out devkitSMS Programming Setup to build 8-bit video games in C for the Sega Master System (SMS). Here we use SDCC v3.6.9 which allows maximum 32KB for your main ROM game code size.

Now, the latest devkitSMS requires SDCC 4.x which supports banked code which means it is now possible to page code out transparently. Plus we'd also like to build SMS projects cross platform for Windows and Linux.


Let’s check it out!

devkitSMS
The devkitSMS is a collection of tools and code built specifically for the Sega Master System but also supports homebrew development using C language for SG-1000, SC-3000 and the Sega Game Gear.

Software
Follow all instructions from the previous post: this documents how to setup the pre-requisite software.

Here is a summary of all required software to be installed:
 Name Version
 C IDE Editor Visual Studio 2015
 C IDE Editor Visual Studio Code
 Cross compiler Small Device C Compiler
 
 Name Version
 Make files Cygwin
 Emulators Emulicious, Fusion, Meka
 Debugger Emulicious Debugger
Note: Emulicioushas dependency on Java therefore launch using java -jar ~/Sega/Emulicious/Emulicious.jar

Windows
Download and install sdcc-4.1.0-x64-setup.exe to C:\Program Files\SDCC. Choose all features to install.


There should be no extra configuration except add C:\Program Files\SDCC\bin to the Environment PATH.


Start | Run | cmd. Type sdcc --version. The following info should display to confirm SDCC version 4.1.0:


Linux
Download and extract sdcc-4.1.0-amd64-unknown-linux2.5.tar.bz2 to ~/sdcc. This should install all features.


There should be no extra configuration except add $HOME/sdcc/bin to the ~/.bashrc file so always available.
 gedit ~/.bashrc
 export PATH="$PATH:$HOME/sdcc/bin"

Launch Terminal. Type sdcc --version [sdcc -v]. The following should display to confirm SDCC version 4.1.0:


Directories
 Windows  C:\Program Files\SDCC\bin
 Linux  ~/sdcc/bin

devkitSMS
Navigate to the devkitSMS repository on github. @sverx has full instructions here and advises to copy the following 4x executables into SDCC bin folder: assets2banks.exe, folder2c.exe, ihx2sms.exe, makesms.exe.
# Clone devkitSMS
git clone https://github.com/sverx/devkitSMS.git

# Copy 4x files
cd devkitSMS
copy assets2banks/%PLATFORM%/assets2banks %INSTALLATION%/SDCC/bin
copy folder2c/%PLATFORM%/folder2c.exe %INSTALLATION%/SDCC/bin
copy ihx2sms/%PLATFORM%/ihx2sms.exe %INSTALLATION%/SDCC/bin
copy makesms/%PLATFORM%/makesms.exe %INSTALLATION%/SDCC/bin

Note: my preference is to usually copy the relevant files up-to-date as each Master System project is built.

Example
As an example, replicate the simple program from 2017 that sets the border colors of the screen using devkitSMS but this time we will port the Windows build cross platform to Linux and include debugging!

Create new directory HelloWorld: ~/HelloWorld. Copy these files across crt0_sms.rel, SMSlib.h, SMSlib.lib. Launch Visual Studio Code. Open HelloWorld directory. Create new file main.c and enter the following code:

main.c
#include "SMSlib.h"
void main ( void )
{
  SMS_setSpritePaletteColor( 0, RGB( 3, 3, 3 ) );
  SMS_displayOn();
  for ( ;; )
  {
    SMS_waitForVBlank();
  }
}

SMS_EMBED_SEGA_ROM_HEADER(9999, 0);
SMS_EMBED_SDSC_HEADER(1, 0, 2017, 9, 15, "StevePro Studios", "Hello World", "Simple Sega Master System demo to run on real hardware!");

Build
Manually compile, link and execute the Hello program. Launch command prompt: Start | Run | cmd.


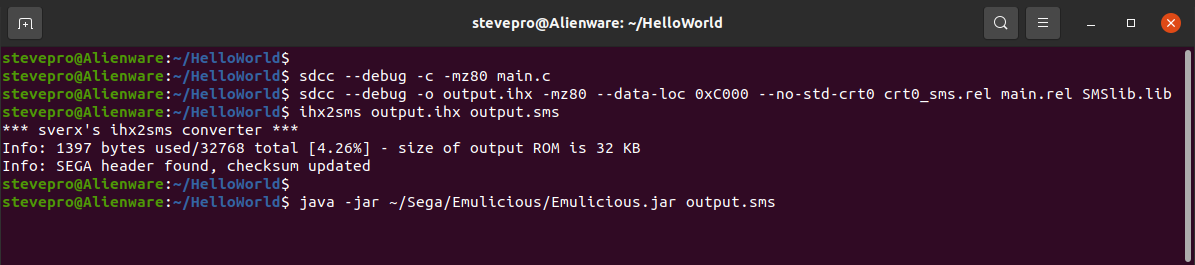
Change directory cd ~/HelloWorld. Next, execute following 3x commands (in bold) but add debug keyword:
 ACTION  COMMAND  OUTPUT
 Compile   sdcc --debug -c -mz80 main.c  main.rel
 Link  sdcc --debug -o output.ihx -mz80 --data-loc 0xC000 --no-std-crt0 crt0_sms.rel
 main.rel SMSlib.lib
 output.ihx
 Exceute  ihx2sms output.ihx output.sms  output.sms 

Finally, type java -jar ~/Sega/Emulicious/Emulicious.jar output.sms to launch the Hello program.
Congratulations! You have just written your first SMS program using devkitSMS.


Automate
Let's automate the build process: create build script file that contains the previous commands. On Windows name the file build.bat. On Linux name the file build.sh and add EXE permissions as chmod +x build.sh.
@echo off
sdcc --debug -c -mz80 main.c
sdcc --debug -o output.ihx -mz80 --data-loc 0xC000 --no-std-crt0 crt0_sms.rel main.rel SMSlib.lib
ihx2sms output.ihx output.sms
java -jar ~/Sega/Emulicious/Emulicious.jar output.sms

Visual Studio Code
Finally, add hidden .vscode folder in Visual Studio Code + include tasks.json and launch.json files beneath:

tasks.json
{
    "version": "2.0.0",
    "label": "build",
    "type": "shell",
    "linux": {
        "command": "./build.sh"
    },
    "windows": {
        "command": "./build.bat"
      },
    "presentation": {"echo": true, "reveal": "always", "focus": false, "panel": "shared", "showReuseMessage": false, "clear": true},
    "group": {"kind": "build", "isDefault": true},
}
Important: On Windows prefer the ./build syntax as Linux otherwise an "unrecognized cmdlet" may result.

launch.json
{
    "version": "0.2.0",
    "configurations": [
        {
            "type": "emulicious-debugger",
            "request": "launch",
            "name": "Launch in Emulicious",
            "program": "${workspaceFolder}/output.sms",
            "port": 58870,
            "stopOnEntry": true
        }
    ]
}
On Linux, launch Emulicious as above. Press Ctrl + Shift + B to build code and F5 to debug step thru code:


Visual Studio 2015
For completeness, if the main workstation is Windows then another option is Visual Studio 2015 can also be used to debug step thru the ANSI-C source code. For more background info see this. Here is the alternative:

main.c
#include "main.h"
void main( void )
{
  devkit_SMS_init();
  devkit_SMS_setSpritePaletteColor( 0, devkit_RGB( 3, 3, 3 ) );
  devkit_SMS_displayOn();
  for( ;; )
  {
    devkit_SMS_waitForVBlank();
  }
}

Summary
To summarize, the Sega Master System development process has been very consistent after the SDCC 4.x upgrade plus the ability to support banked code means initial 32KB ROM restriction now no longer applies!
This will be the topic of the next post.

Saturday, January 1, 2022

Retrospective XIII

Last year, I conducted a simple retrospective for 2020. Therefore, here is a retrospective for 2021.

2021 Achievements
  • Setup Z80 Assembly Programming cross platform for Windows, MacOS/X and Linux
  • Configure VS Code Emulicious Debugger plugin for Z80 source code stepin + hacks
  • Enter Van Halen demo for SMS Power! 2021 competition built in pure Z80 Assembly
  • Build Van Halen quiz using C/SGDK for the Sega MegaDrive similar to C/devkitSMS
  • Upgrade Simpsons Trivia for Sega Master System include more characters and SFX
  • Port Simpsons Trivia to the Sega MegaDrive using similar C development processes
  • Compile Docker cheat sheet for cluster containerization in Cloud Native technology
  • Compile Kuberenetes cheat sheet for Cloud Native technology cluster orchestration
Note: port low level homebrew games built from C/devkitSMS to C/SGDK is an achievement!

2022 Objectives
  • Configure VS Code Emulicious Debugger plugin for C/devkitSMS source code step thru
  • Transition homebrew programming skills in C to professional work for example in CGo
  • Expand low level cross platform skills to Linux kernel e.g. eBPF networking + security
  • Extend Golang into Docker / Kubernetes experience as Cloud Native technology work

Cloud Cloud Computing is the on-demand delivery of infrastructure [hardware / servers], storage + databases via the Internet frequently delivered by cloud-based platforms: Amazon AWS / Google GCP / Microsoft Azure.

Cloud Native is architecture for assembling these cloud-based components optimized for cloud environment; Not about servers but the services. Enterprises modernize their infrastructure and process by choosing cloud technologies e.g. Docker for containerization, Kuberenetes for orchestration, that best fit their specific needs.

Golang Golang [Go] is statically typed programming language syntactically similar to C but with memory safety and garbage collection. Go was developed at Google to help solve the problem of concurrent messaging between distributed systems in the cloud using CSP style concurrency. Subsequently, Go is asynchronous by default.

Therefore, all three major public cloud providers AWS, GCP, Azure support Go and have SDKs that interface with their systems in Go. Thus Go may become the standard way of distributed computing into the future.

Cgo
CGo is a technology which allows Go programs to interoperate with C libraries. For example distributed cloud computing packages that consume ModSecurity C/C++ library for Web Applicaton Firewall (WAF) detection.

Another example eBPF: a revolutionary technology that can run sandboxed C programs safely and efficiently extending the capabilities of the Linux kernel, without requiring changes to kernel source code or load kernel modules, consumed from Go packages providing high-performance networking in cloud native environments.

Summary
Writing low level C code to target 8-bit Sega Master System hardware and now the 16-bit Sega Mega Drive it has proved to be very valuable experience for CGo applications which could assist in Go + Cloud Computing. The next challenge is port projects exclusively on Windows and include Linux system builds cross platform J

Monday, November 15, 2021

Vintage Van Halen Code Complete

There's only one way to rock! Vintage Van Halen celebrates forty awesome riffs shred by Edward Van Halen. Built using the Sega Genesis Development Kit, Vintage Van Halen is available for free download from itch.io.

Let's check it out!

Note: Vintage Van Halen development based on SGDK Programming Setup + SGDK Programming Sample. Download source code here.


Inspiration
Eddie Van Halen is regarded as one of the greatest guitarists of all time. His innovations revolutionized guitar playing and influenced generations of guitarists. Eddie is responsible for some of the most memorable riffs in rock history and his band "Van Halen" continues to remain as one of the world's top selling artists of all time.

Instructions
Simple: move the joystick Up and Down to select a multi-choice answer: 1, 2, 3, 4. Press button A to select an answer or progress forward through any prompts. Note: Press button B to always go back. Joystick Left and Right are not used at all. Finally, Press button C during the game play to replay any riff at any time!

Tools
Here is a list of Tools, Frameworks, Utilities and Emulators that were used in development of this project:
 Programming  SGDK
 Compiler  gcc 4.9.3
 IDE  Visual Studio 2015
 Languages  C / 68000
 Graphics  Image Resizer / BMP converter
 Music  Audacity / YouTube
 Emulators  Emulicious / Gens KMod

ROM Hacking
You can hack this ROM! Download + dump VintageVanHalen into Hex Editor, e.g. HxD, and modify bytes:
 ADDRESS  VARIABLE  DESCRIPTION
 0x004F  DelaySpeed  Used to speed through any game delay.
 0x0050  Invincible  Non-zero value always enables cheating.
 0x0051  RiffSelect  Set the value to 2,3,4 index otherwise 1.
 0x0052  DiffSelect  Set value to 1=Easy otherwise 2=Hard.

hack_manager.c
#ifndef __HACK_MANAGER_H__
#define __HACK_MANAGER_H__

#define PEEK(addr)       (*(unsigned char *)(addr))
#define POKE(addr, data) (*(unsigned char *)(addr) = (data))

#define HACKER_START  0x004F
void engine_hack_manager_load()
{
  struct_hack_object *ho = &global_hack_object;
  ho->hack_delayspeed = PEEK( HACKER_START - 2 );        // 0x01DE Used to speed through any game delay.
  ho->hack_invincible = PEEK( HACKER_START - 1 );        // 0x01DF Non-zero value enables always cheats.
  ho->hack_riffselect = PEEK( HACKER_START + 1 );        // 0x01E0 Set value to 2,3,4 index otherwise 1.
  ho->hack_diffselect = PEEK( HACKER_START + 2 );        // 0x01E1 Set value to 1=Easy otherwise 2=Hard.
}
#endif//__HACK_MANAGER_H__

Cheats
Hack the ROM [above] to show the answers for every quiz during entire game session or alternatively press button C five times on Title screen when prompted to "Press Start" to show the answers to the current quiz!

Also, on Title screen press + hold joystick down while holding button B. This will show all the game statistics persisted across all game sessions. Finally, on Splash screen press and hold button B to reset all game stats.

storage_manager.c
#ifndef _STORAGE_MANAGER_H_
#define _STORAGE_MANAGER_H_

void engine_storage_manager_code()
{
  sRamOffSet = 0x0000;
  signed char byte;

  SYS_disableInts();
  SRAM_enable();

  byte = SRAM_readByte( sRamOffSet++ );        // Read.
  SRAM_writeByte( sRamOffSet++, byte );        // Write.

  SRAM_disable();
  SYS_enableInts();
}
#endif//_STORAGE_MANAGER_H_

Credits
Extra special thanks goes to @MegadriveDev for the SGDK. Plus StevePro Studios would like to give thanks: @bigevilboss, @matteusbeus, @MoonWatcherMD, @ohsat_games, @SpritesMind for SGDK support online!


Summary
Vintage Van Halen is the first 16-bit project ever built by StevePro Studios for the Sega MegaDrive / Genesis. Fortunately, like Sega Master System, the MegaDrive community provides fantastic online help and support.

After years of developing for Sega Master System, it was seamless to apply many of the programming skills acquired from 8-bit development to 16-bit thus the project was completed in a very short time. Awesome J

Wednesday, September 15, 2021

Kubernetes Cheat Sheet

Kubernetes is an open source container orchestration system for automating application deployment, scaling and management. Maintained by the Cloud Native Computing Foundation, Kubernetes works with a range of container tools and runs applications deployed in containers in a cluster often with images built using Docker.

Let's check K8s out!

Tools
Here are some commonly used tools that can be installed to work with + help manage Kubernetes clusters:
 kubectl  Command-line tool to run commands against Kubernetes clusters
 minikube  Runs a single-node Kubernetes cluster on your personal computer
 kind  Runs Kubernetes on your local computer inside Docker containers
 kubeadm  Used to create and manage and secure larger Kubernetes clusters

Installation
Install Kubernetes with Docker Desktop on Windows and Mac OS/X. Install Kubernetes on Linux accordingly.

Minikube
Here are instructions how to get Kubernetes running locally as single node cluster on Ubuntu with Minikube:
# Prerequisites
sudo apt install cpu-checker && sudo kvm-ok
sudo apt install libvirt-clients libvirt-daemon-system qemu-kvm \
    && sudo usermod -a -G libvirt $(whoami) \
    && newgrp libvirt
    
sudo virt-host-validate
curl -LO https://storage.googleapis.com/kubernetes-release/release/$(curl -s https://storage.googleapis.com/kubernetes-release/release/stable.txt)/bin/linux/amd64/kubectl \
    && sudo install kubectl /usr/local/bin && rm kubectl

curl -LO https://storage.googleapis.com/minikube/releases/latest/docker-machine-driver-kvm2 \
    && sudo install docker-machine-driver-kvm2 /usr/local/bin/ && rm docker-machine-driver-kvm
    
curl -LO https://storage.googleapis.com/minikube/releases/latest/minikube-linux-amd64 \
    && sudo install minikube-linux-amd64 /usr/local/bin/minikube && rm minikube-linux-amd64

minikube version
minikube start


KinD
Kubernetes in Docker [KinD] allows an approach to run a full Kubernetes cluster using Docker containers to simulate multiple Kubernetes nodes operating all at once instead of running everything in virtual machines.

Assume Go installed. Launch Terminal. Enter commands to install KinD. Export path in ~/.bashrc and reboot:
 go get sigs.k8s.io/kind

 # Add KinD to $PATH in ~/.bashrc
 export PATH="$PATH:~/go/bin/"
 sudo reboot
 # Create test and delete cluster
 kind create cluster --wait 5m \
 export KUBECONFIG="$(kind get kubeconfig-path)"
 kubectl cluster-info
 kind delete cluster


kubeadm
kubeadm is another tool built to provide a fast path for creating Kuberentes clusters. kubeadm performs all actions to get a minimum viable cluster up and running. Once installed you can then create the K8s cluster.
sudo apt-get update
sudo apt-get install -y apt-transport-https ca-certificates curl

sudo curl -fsSLo /usr/share/keyrings/kubernetes-archive-keyring.gpg https://packages.cloud.google.com/apt/doc/apt-key.gpg
echo "deb [signed-by=/usr/share/keyrings/kubernetes-archive-keyring.gpg] https://apt.kubernetes.io/ kubernetes-xenial main" | sudo tee /etc/apt/sources.list.d/kubernetes.list

sudo apt-get update
sudo apt-get install -y kubelet kubeadm kubectl
sudo apt-mark hold kubelet kubeadm kubectl
kubeadm version

Dashboard
Once Kubernetes cluster is setup there are various options to view all resources. Minikube: simply the launch terminal | minikube dashboard. Alternatively, install VS Code Kubernetes extension and view all resources.


KinD dashboard is more involved. Enter these commands to configure KinD dashboard to run in the browser.
kubectl apply -f https://raw.githubusercontent.com/kubernetes/dashboard/v2.1.0/aio/deploy/recommended.yaml
kubectl get pod -n kubernetes-dashboard
kubectl create clusterrolebinding default-admin --clusterrole cluster-admin --serviceaccount=default:default

token=$(kubectl get secrets -o jsonpath="{.items[?(@.metadata.annotations['kubernetes\.io/service-account\.name']==\
'default')].data.token}"|base64 --decode)
echo $token
kubectl proxy

Launch the browser and enter the following URL. Once prompted enter the service token above and click OK.
http://localhost:8001/api/v1/namespaces/kubernetes-dashboard/services/https:kubernetes-dashboard:/proxy

IMPORTANT
If you receive following error: listen tcp 127.0.0.1:8001: bind: address already in use then enter command:
 netstat -tulnap | grep 8001
 sudo apt install net-tools
 sudo fuser -k 8001/tcp
 netstat -tulnap | grep 8001


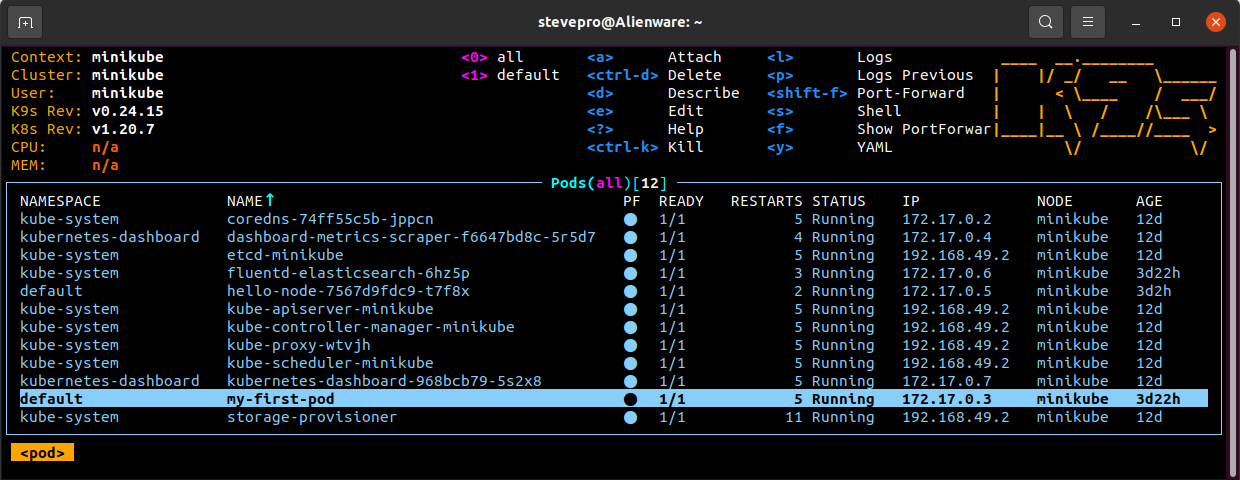
k9s is the Kubernetes CLI to manage clusters. Download the latest binary and extract into /usr/local/bin. You may need to manually create the ~/.k9s folder otherwise you may receive the error Permission denied.


kubectl
Enable auto completion as per the kubectl Cheat Sheet and update ~/.bashrc to alias the kubectl command:
 # Auto complete
 source <(kubectl completion bash)
 echo "source <(kubectl completion bash)" >> ~/.bashrc
 
 # Alias kubectl
 alias k='kubectl'
 complete -F __start_kubectl k
 alias kdr='kubectl --dry-run=client -o yaml'

The Kubernetes cluster configuration file lives at ~/.kube/config. Obtain Kubernetes config + context info:
 kubectl config view  Show Kubernetes cluster configuration
 kubectl config get-contexts  Show all Kubernetes cluster contexts
 kubectl config current-context  Show current Kubernetes cluster context
 kubectl config use-context my-cluster-name  Set default context to my-cluster-name
 kubectl config set-context --current --namespace=my-ns  Set default context namespace to my-ns


Definitions
Here is some basic terminology when working with containerized applications running in Kubernetes cluster:
 Namespace  Scope cluster resources and a way to isolate Kubernetes objects
 Workload  Containerized application running within the Kubernetes cluster
 Container  Decouples applications from the underlying host infrastructure
 Pod  Smallest deployable unit as created and managed in Kubernetes
 Node  Workloads are placed in Containers on Pods to be run on Nodes
 Replicaset  Maintains stable set of replica pods available running any time
 Deployment  Provides a declarative way to update all Pods and ReplicaSets
 Service  Abstract way to expose an application running on set of Pods


Planes
Networking back in the day would have rules + policies about how to route network packets. These policies would make up the network control plane. The control plane is concerned with establishing network policy. Meanwhile, the data plane is everything else in the network architecture that enforces all network policies.

Control Plane
In Kubernetes, the control plane is the set of components that "make global decisions about the cluster" e.g. scheduling as well as detecting and responding to cluster events e.g. auto scaling pods due to traffic spikes.

Listed are control plane components that run on the master node to keep the cluster in the "desired state":
 Store (etcd)  Key-value backing store for all Kubernetes objects and data info
 API Server  Exposes the Kubernetes API as the front end for the control plane
 Controller-Manager  Runs controller processes e.g. Nodes, Jobs, Endpoints + Services
 Scheduler  Watches for newly created pods and assigns nodes to run them on

Data Plane
In Kubernetes, the data plane is the set of worker nodes with their pods and containers that enforce all the global decisions made about the cluster from the master node e.g. auto scaling pods due to traffic spikes.

Listed are data plane components that run on each worker node maintaining pods and runtime environment:
 Kubelet  Worker agent that makes sure containers are running inside Pods
 Container Runtime  Software that is responsible for running containers on worker nodes
 Kube Proxy  Network proxy that maintains all network rules on the worker nodes

IMPORTANT
Here are 2x simple commands to get full information about control and data planes for Kubernetes cluster:
 kubectl cluster-info  Kubernetes control plane is running at the designated IP address
 kubectl cluster-info dump  Full description of all Kubernetes components running in the cluster


Commands
Here is list of useful commands. Foreach command you can add the --help flag to see more options to pass:
 kubectl get all -A  Get all resources across all namespaces
 kubectl describe pod my-pod  Get the full YAML declaration for my-pod
 kubectl get pod my-pod -o yaml  Get the expanded declaration for my-pod
 kubectl logs -f my-pod  Get logs for my-pod + tail all its updates
 kubectl get nodes -o wide  List all full details of nodes in namepsace
 kubectl get deployments -A  List all deployments from all namespaces
 kubectl get services -A  List all services across all the namespaces
List all container(s) for my-pod kubectl get pod my-pod -o jsonpath="{.spec.containers[*].image}".

Tutorial
Hello MiniKube tutorial shows you how to create a sample app on Kubernetes applying the above resources.
 minikube start  Start Minikube cluster
 minikube dashboard  Launch Minikube dashboard
 minikube ip  Display Minikube IP address
 minikube ssh  Secure shell into Minikube node
 minikube stop  Stop Minikube cluster
 minikube delete  Delete Minikube cluster

Create Deployment
 minikube start
 minikube dashboard
 kubectl create deployment hello-node --image=k8s.gcr.io/echoserver:1.4
 kubectl get deployments

Create Service
 kubectl expose deployment hello-node --type=LoadBalancer --port=8080
 kubectl get services
 minikube service hello-node

Exec into Pod
 kubectl attach hello-node-7567d9fdc9-mblh7 -i
 kubectl exec hello-node-7567d9fdc9-mblh7 -- ls /
 kubectl exec -it hello-node-7567d9fdc9-mblh7 -- /bin/sh
 kubectl exec --stdin --tty hello-node-7567d9fdc9-mblh7 -- /bin/sh

Tail Logs
 kubectl logs -f hello-node-7567d9fdc9-mblh7
 minikube stop
 minikube delete


Management
The tutorial demonstrates imperative commands using kubectl to operate directly on live Kubernetes objects in the cluster. This is the useful to get started or run one-off tasks however these actions provide no history.

Whereas using declarative object configuration requires configuration files to be stored locally first. All CRUD operations will be detected automatically per Kuberentes object thus configuration can be version controlled.


Example
Code an example from scratch as full end-to-end Web API demo on local host, in Docker and on Kubernetes. Launch Terminal | go mod init testwebapi. Launch VS Code. Enter following code. Press F5 to debug main.go.
 main.go
 package main
 import (
 	"fmt"
 	"html"
 	"log"
 	"net/http"
 )
 func main() {
 	bind := ":8081"
 	log.Println("Start web server on port", bind)
 	http.HandleFunc("/", func(w http.ResponseWriter, r *http.Request) {
 	  fmt.Fprintf(w, "Hello, %q", html.EscapeString(r.URL.Path))
 	})
 	log.Fatal(http.ListenAndServe(bind, nil))
 }

Test main.go: Launch Terminal | curl http://localhost:8081/test. Next, create Dockerfile to build image:
  1. Ctrl+Shift+P. Choose Docker: Add Docker Files to Workspace...
  2. Select Application Platform. Choose GoLang
  3. What port does app listen on? Choose 8081
  4. Include optional Docker Compose files? Select No
 Dockerfile
 #build stage
 FROM golang:alpine AS builder
 RUN apk add --no-cache git
 WORKDIR /go/src/app
 COPY . .
 RUN go get -d -v ./...
 RUN go build -o /go/bin/app -v ./...
 #final stage
 FROM alpine:latest
 RUN apk --no-cache add ca-certificates
 COPY --from=builder /go/bin/app /app
 ENTRYPOINT /app
 LABEL Name=golang20 Version=0.0.1
 EXPOSE 8081

In VS Code | Right click Dockerfile | Build Image... Choose name to tag image. Once complete Image will be listed in Docker extension Images list. Expand image built | Run. Refresh Docker extension Containers list.

Test Dockerfile: Launch Terminal | curl http://localhost:8081/test. Lastly, deploy Web API to the cluster. Enter the following YAML as image deployment to local installed cluster and expose the endpoint as service:
 Kubernetes.yaml
 --- Deployment
 apiVersion: apps/v1
 kind: Deployment
 metadata:
   name: testwebapi
 spec:
   replicas: 1
   selector:
     matchLabels:
       app: testwebapi
   template:
     metadata:
       labels:
         app: testwebapi
     spec:
       containers:
         - name: testwebapi
           image: stevepro/testwebapi:1.0
           imagePullPolicy: Never
           resources:
             limits:
               memory: "128Mi"
               cpu: "500m"
           ports:
             - containerPort: 8081 
 --- Service
 apiVersion: v1
 kind: Service
 metadata:
   name: testwebapi-service
 spec:
   type: NodePort
   ports:
     - name: http
       port: 8082
       targetPort: 8081
   selector:
     app: testwebapi


IMPORTANT: Kubernetes Templates is a handy VS Code extension that helps create Kubernetes YAML files!

Minikube
Ensure that Minikube is installed. Launch Terminal | minikube start. Ensure images will be deployed locally:
 minikube start
 minikube docker-env
 eval $(minikube -p minikube docker-env)

Build the image as above but this time in the local Minikube cluster docker build -t stevepro/testwebapi:1.0 .
Apply the deployment and service YAML using the kubectl. Verify objects created from minikube dashboard.
 docker build -t stevepro/testwebapi:1.0 .
 kubectl apply -f Kubernetes.yaml

Test Kubernetes: Launch Terminal. Execute minikube service testwebapi-service --url to obtain the cluster IP address + port. Build Minikube cluster socket and test the API | curl http://192.168.49.2:30799/test.
 minikube service testwebapi-service --url
 curl http://192.168.49.2:30799/test

Finally, clean up and delete deployment + service YAML after testing complete and destroy Minikube cluster.
 kubectl delete -f Kubernetes.yaml
 minikube stop


KinD
Code an example from above as full end-to-end Web API demo on local host, in Docker and on Kubernetes. Ensure that KinD is installed. Launch Terminal | kind create cluster. Ensure images will be deployed locally:
 kind create cluster

Build the image as above but this time in the local KinD cluster as docker build -t stevepro/testwebapi:2.0. Load the newly built local image into KinD cluster. Apply the deployment and service YAML using the kubectl.
 docker build -t stevepro/testwebapi:2.0 .
 kind load docker-image stevepro/testwebapi:2.0
 kubectl apply -f Kubernetes.yaml

Test Kubernetes: Launch Terminal. Execute kubectl get nodes -o wide to obtain cluster INTERNAL-IP. Execute kubectl get services to obtain cluster port. Build socket and test | curl http://172.18.0.2:31196/test.
 kubectl get nodes -o wide
 kubectl get services
 curl http://172.18.0.2:31196/test

Finally, clean up and delete deployment + service YAML after testing complete and destroy the KinD cluster.
 kubectl delete -f Kubernetes.yaml
 kind delete cluster


Source Code
Finally, navigate the Kubernetes source code to familiarize yourself with the code base and debug step thru the source code especially if you would like to participate in any one of the Special Interest Groups [SIGs].

git clone the Kubernetes source code. Launch folder in VS Code. Search for main.go e.g. from ./cmd/cloud-controller-manager. Right click main.go | Open in | Terminal. go build . go run main.go. Press F5 to debug:
 git clone https://github.com/kubernetes/kubernetes.git
 cd kubernetes
 make
 find -L -type f -name 'main.go'
 cd ./cmd/cloud-controller-manager
 go build .
 go run main.go
 Press F5


Summary
To summarize, Kubernetes has greatly simplified cloud native infrastructure for developers and provides a scalable framework for application deployment. However, just like any new tool or technology, Kubernetes brings with it new security challenges especially due to the ephemeral nature of containerized applications.

Consequently, the Container Network Interface [CNI] initiative was created to define a standardized common interface between container execution and Kubernetes networking layer to address these security concerns.

Thus Kubernetes plugins like Cilium has become the most popular CNI for cluster networking thru definition and enforcement of network policies. Cilium prescribes to which pods can send and receive traffic securely throughout the cluster which becomes critical esp. if Kubernetes adoption continues to grow in the future!