Docker is a Platform as a Service product that uses OS-level virtualization to deliver software in packages called containers. Containers are isolated from one another and bundle their own software + libraries and configuration files yet share single operating system kernel thus use fewer resource than virtual machines.

Let's check it out!
Installation
Docker Engine is available on a variety of Linux platforms. On Windows and Mac OS/X it is easiest to install Docker Desktop as a static binary installation. Install Docker Engine as per Operating System instructions.
Windows
Install Docker Desktop on Windows which will install the Docker Engine, Docker Compose and Kubernetes.
Mac OS/X
Install Docker Desktop on Mac OS/X which will install the Docker Engine, Docker Compose and Kubernetes.
Linux
Docker provides .deb + .rpm packages for various Linux distributions. For example Install Docker on Ubuntu:
sudo apt-get update
sudo apt-get remove docker docker-engine docker.io
sudo apt install docker.io
sudo systemctl start docker
sudo systemctl enable docker
docker version
docker images
The final 2x commands may throw the following error while trying to connect to the Docker daemon socket:
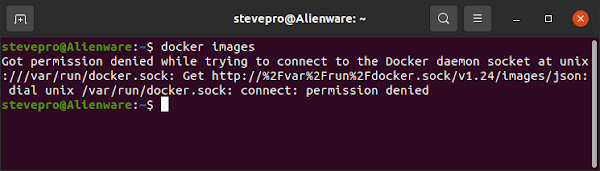
Here is one way to fix "Got permission denied while trying to connect to the Docker daemon socket" error:
sudo groupadd docker
sudo usermod -aG docker ${USER}
sudo reboot
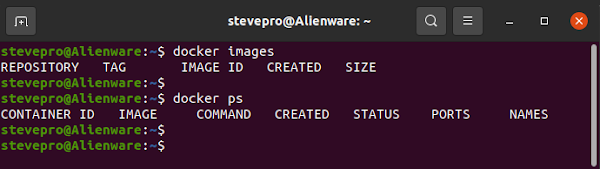
docker version
docker images
IMPORTANT
You may also install docker-compose esp. if you are defining + running multi-container Docker applicaitons.
sudo apt install docker-compose
sudo docker-compose --version
If an older version of docker-compose is installed + you would like to upgrade then complete the following:
sudo apt remove docker-compose
sudo apt update
sudo curl -L "https://github.com/docker/compose/releases/download/1.29.2/docker-compose-$(uname -s)-$(uname -m)" -o /usr/local/bin/docker-compose
sudo chmod +x /usr/local/bin/docker-compose
sudo docker–compose --version
Definitions
When you learn Docker, you find that Docker Images are simply templates used to build Docker Containers. Docker Containers are small isolated environments which are runnable version of their Images. Finally, the Dockerfile contains all the commands that specify how an Image should be built and Container should run.
On brand new install on Docker there will be no Docker Images built or Docker Containers running. Verify:
Hello World
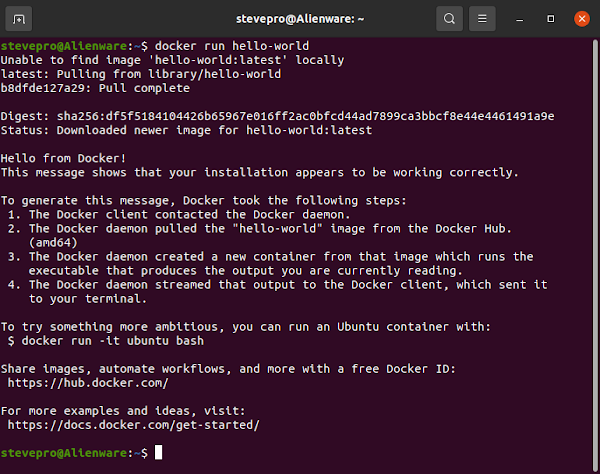
The simplest way to pull down Docker image from the Docker Hub is to execute docker run hello-world.
Getting Started
Here is more information on Docker Orientation and setup tutorial to build and run an image as a container:
docker run -d -p 80:80 docker/getting-started
docker images
docker ps
Launch browser. Enter http://localhost. You'll now see the same content locally as the Getting Started page! Afterwards cleanup. Enter the following commands from the Terminal to stop container and remove image:
docker stop $(docker ps -q)
docker rmi $(docker images -qa) --force
docker system prune -a
Example #1
Code an example from scratch: build simple Hello application in Python and run on localhost in a container:
| app.py |
Dockerfile |
from flask import Flask
app = Flask(__name__)
@app.route("/")
def hello():
return "Hello World!"
if __name__ == "__main__":
app.run(debug=True, host="0.0.0.0")
|
# Inherit from the Python Docker image
FROM python:3.7-slim
# Install the Flask package via pip
RUN pip install flask==1.0.2
# Copy the source code to app folder
COPY ./app.py /app/
# Change the working directory
WORKDIR /app/
# Set "python" as the entry point
ENTRYPOINT ["python"]
# Set the command as the script name
CMD ["app.py"]
|
Follow best practices for writing DockerFile as each FROM, RUN, COPY, CMD instruction creates one layer.
Enter the following commands to build and run image as a container. Navigate browser to localhost:5000.
| Docker Image |
Docker Container |
docker build -t flask_app:0.1 .
docker images
|
docker run -d -p 5000:5000 flask_app:0.1
docker ps
|
Also curl http://localhost:5000. To stop the running container enter command: docker stop $(docker ps -q)
IMPORTANT
If you receive OSError: [Errno 98] Address already in use [Port 5000] then execute the following commands:
netstat -tulnap | grep 5000
sudo apt install net-tools
sudo fuser -k 5000/tcp
netstat -tulnap | grep 5000
|
Example #2
Code an example from scratch: build simple Hello application in GoLang but automate Dockerfile generation.
| app.go |
package main
import (
"fmt"
"log"
"os"
"net/http"
"github.com/gorilla/mux"
)
func main() {
port := "5000"
r := mux.NewRouter()
r.HandleFunc("/", hello)
http.Handle("/", r)
fmt.Println("Starting up on " + port)
log.Fatal(http.ListenAndServe(":" + port, nil))
}
func hello(w http.ResponseWriter, req *http.Request) {
fmt.Fprintln(w, "Hello world!")
}
|
Launch VS Code. Open folder hosting app.go. Install Docker extension. Generate Dockerfile with the actions:
- Ctrl+Shift+P. Choose Docker: Add Docker Files to Workspace...
- Select Application Platform. Choose GoLang
- What port does app listen on? Choose 5000
- Include optional Docker Compose files? Select No
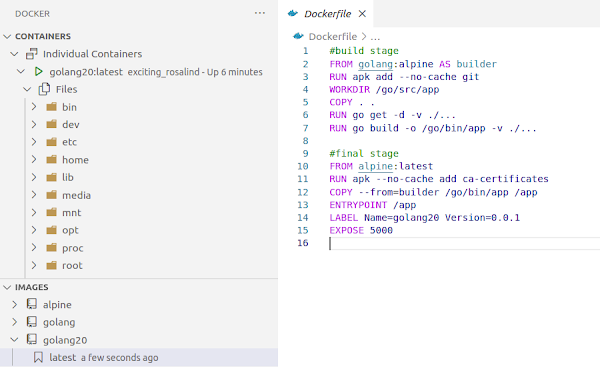
| Dockerfile |
 #build stage
 FROM golang:alpine AS builder
 RUN apk add --no-cache git
 WORKDIR /go/src/app
 COPY . .
 RUN go get -d -v ./...
 RUN go build -o /go/bin/app -v ./...
|
 #final stage
 FROM alpine:latest
 RUN apk --no-cache add ca-certificates
 COPY --from=builder /go/bin/app /app
 ENTRYPOINT /app
 LABEL Name=golang20 Version=0.0.1
 EXPOSE 5000
|
In VS Code | Right click Dockerfile | Build Image... Choose name to tag image. Once complete Image will be listed in Docker extension Images list. Expand image built | Run. Refresh Docker extension Containers list. Navigate browser to localhost:5000. Expand Container to see all files from the running Image built earlier:
Example #3
Code an example from scratch: build simple Hello application in C++ and run interactively inside container:
| main.cpp |
Dockerfile |
 #include <iostream>
 using namespace std;
 int main()
 {
     cout << "Hello World C++" << endl;
     return 0;
 };
|
 FROM gcc:latest

 COPY . /usr/src/cpp_test
 WORKDIR /usr/src/cpp_test

 RUN g++ -o Test main.cpp
 CMD [ "./Test" ]
|
Enter the following commands to build and run image as a container. Run interactive inside container also.
| Run normally |
Run interactively |
docker build . -t cpp_test:1.0
docker run --rm cpp_test:1.0
|
docker run -it cpp_test:1.0 bash
./Test
|
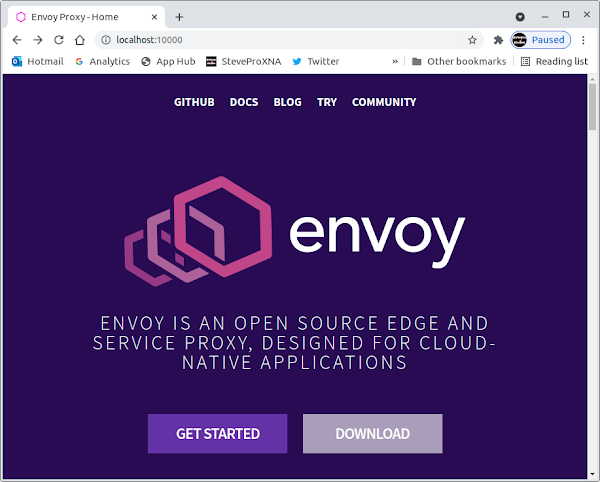
Example #4
Run real world example. Pull Envoy image from Internet. Run locally to prove all dependencies contained:
docker run --rm envoyproxy/envoy-dev:716ee8abc526d51f07ed6d3c2a5aa8a3b2481d9d --version
docker run --rm envoyproxy/envoy-dev:716ee8abc526d51f07ed6d3c2a5aa8a3b2481d9d --help
Download envoy-demo.yaml configuration. Run following command + navigate to http://localhost:10000.
docker run --rm -it \
      -v $(pwd)/envoy-demo.yaml:/envoy-demo.yaml \
      -p 9901:9901 \
      -p 10000:10000 \
      envoyproxy/envoy-dev:1acf02f70c75a7723d0269b7f375b3a94cb0fbf0 \
          -c envoy-demo.yaml
curl -v localhost:10000
Interactive
Shell into the remote running Container. Navigate the file system from above using the following command:
docker exec -it $(docker ps -q) bash
docker run -it [image_name]:[tag] bash
|
Commands
Here is list of useful commands. Foreach command you can add the --help flag to see more options to pass:
| Command |
Description |
| docker build -t [image_name]:[tag] . |
Build a Docker image |
| docker run --name [container_name] [image_name]:[tag] |
Run a Docker container specifying a name |
| docker logs -f [container_id_or_name] |
Fetch the logs of a container |
| docker exec -it [container_id_or_name] bash |
Run a command in a running container |
| docker rm $(docker ps -aq) |
Remove all containers |
| docker rmi $(docker images -aq) |
Remove all images |
| docker rmi $(docker images -f dangling=true -q) |
Remove all dangling images |
Note: another command to clean up dangling images is simply docker image prune.
Samples
Here is a list of useful commonly used sample commands that can be used frequently as simple cheat sheet:
| Command |
Description |
| docker images |
Show all Docker images |
| docker ps |
Show all running containers |
| docker stop $(docker ps -q) |
Stop all running containers |
| docker system prune -a |
Remove all images + containers |
IMPORTANT: if any commands above throw a "docker: 'docker' is not a docker command" then run as sudo!
Registration
Create an account on the Docker hub. In VS Code | Docker extension | Registries | Connect Registry. Enter case sensitive Docker credentials. Right click Image | Push Image to registry | Pull Image from the registry.
Debugging
Once Dockerfiles become more complex you may like to follow some of these tips for debugging containers. The following video demonstrates some of these ideas to debug Docker containers like override ENTRYPOINT
- Override the container entrypoint and exec onto it
- Use docker cp to copy files between containers and host
- Run a debugger inside the container and connect to it from the host system
Summary
To summarize, Docker provides an open standard for packaging and distributing containerized applications, however, the challenge can then become how to coordinate and schedule increasing amount of containers?
This is where Kubernetes can help: Kubernetes is open-source orchestration software that provides an API controlling how and where those containers will run. Kubernetes can scale out multple deployed and more!
This will be the topic of the next post.