Wednesday, May 1, 2024

MacOS Setup Cheat Sheet

In late 2020, Apple unleashed its industry-leading performant M1 chip designed specifically for the Mac. As a result, M1 powered MacBooks have provened to be much faster than Windows thus making Apple computers more appealing for companies than ever. Especially with the rise of A.I. requirements for faster data access.

The issue now for Windows users is to seamlessly transfer all keyboard shortcuts + muscle memory to Mac!

Let's check it out!

Documentation
If you are new to the Mac then the first thing to do is acquaint yourself with keyboard shortcuts as outlined in various online documentation pages and especially with what are those symbols shown in menus on Mac:


Keyboards
The major differences between Windows and Mac keyboards are the special keys found on either side of the spacebar known as modifier keys and are typically used for System Keybindings. Here is quick comparison:
 Location Windows Mac OS Keycode Modifier Menu Symbol
 Left Ctrl Ctrl @ ⌃
 Middle WinKey Option ~ ⌥
 Right Alt Command ^ ⌘
 Left Shift Shift $ ⇧

Out-of-the-box, there are some common keyboard shortcuts shared across Windows and Mac, for example:
 Alt + Tab Toggle between all open applications
 Ctrl + Tab Toggle between all open tabs within an application

However, for all common Ctrl + type Windows keyboard shortcuts the Mac prefers to use the Command key:
 Ctrl + A Select all  Ctrl + Q Quit application
 Ctrl + C Copy item  Ctrl + S Save item
 Ctrl + F Find item  Ctrl + V Paste item
 Ctrl + N New item  Ctrl + W Close window
 Ctrl + O Open item  Ctrl + X Cut item
 Ctrl + P Print item  Ctrl + Z Undo action

Therefore, remap the modifier keys in System Settings | Keyboard | Keyboard Shortcuts... | Modifier Keys:

IMPORTANT: in order to retain Alt + Tab functionality we have now had to re-map Option to Command also! There is an AltTab utility but companies may disallow the installation of third party software, unfortunately.

System Settings
Customize your Mac with System Settings. Launch System Settings from Dock and make following changes:
 General Language & Region Region = New Zealand
 Accessibility Keyboard Full Keyboard Access
 Accessibility Pointer Control | Trackpad Options Use trackpad for scrolling = DISABLED
 Appearance Show scroll bars Automatically based on mouse or trackpad
 Desktop & Dock Dock Size = Small
 Desktop & Dock Dock  Position on screen = Left
 Desktop & Dock Desktop & Stage Manager Click wallpaper to reveal desktop =
 Only in Stage Manager
 Desktop & Dock Group windows by application DISABLED
 Desktop & Dock Displays have separate Spaces DISABLED
 Displays Dual Monitors 1920 x 1080 (Default)
 Users & Groups Administrator Update login photo
 Keyboard Key repeat rate Fast
 Keyboard Delay until repeat Short
 Keyboard Turn keyboard backlight off after inactivity Never
 Keyboard Press fn key to Do Nothing
 Keyboard Keyboard navigation Enabled
 Trackpad Scroll & Zoom Natural scrolling = DISABLED

Here is some more information explaining the rationale behind some of these System Settings options set:
  1. Use trackpad for scrolling enables scroll bars visible unconditionally + not autohide
  2. Displays have separate Spaces on dual monitors prevents other screen to go black
  3. Displays | Dual Monitors | Ensure resolution is the same default for both monitors
  4. Keyboard | Key repeat rate | Fast ensures that holding key down prevents accents
  5. Trackpad | Natural scrolling Disabled ensures vertical scrolling naturally downward

Keyboard Shortcuts
Customize your general Mac keyboard shortcuts. Launch System Settings | Keyboard | Keyboard Shortcuts:

Here is my quick summary of Keyboard Shortcuts setup that will be compatible with Application navigation:
 Launchpad & Dock Turn Dock hiding on/off DISABLED
 Launchpad & Dock Show Lauchpad DISABLED
 Mission Control Show Desktop [F11] DISABLED
 Mission Control Move left a space [Cmd + left] DISABLED
 Mission Control Move right a space [Cmd + right] DISABLED
 Keyboard Move focus to the window toolbar [Cmd + F5] DISABLED
 Keyboard Move focust to next window [Ctrl + `] ENABLED
 Input Sources Select previous input source [Cmd + Space] DISABLED
 Screenshots Save picture of screen as a file [Ctrl + 3] ENABLED
 Screenshots Save picture of selected area as a file [Ctrl + Shift + 4] ENABLED
 Spotlight Show Spotlight search [Ctrl + Space] DISABLED
 Accessibility Turn VoiceOver on or off [Ctrl + F5] DISABLED
 App Shortcuts All Applications | Rename F2

Here is more information explaining the rationale behind some of these Keyboard Shortcuts... options set:
  1. Disable F11 prevents the Desktop from always showing
  2. Disable Cmd + left prevents move former word collision
  3. Disable Cmd + right prevents move next word collision
  4. Disable Cmd + F5 key prevents IDE debugging collision
  5. Disable Cmd + Space prevents IDE intellisense collision
  6. Disable Ctrl + Space prevents IDE intellisense collision
  7. Disable Ctrl + F5 key prevents Voice Over alternating

Finder
The Finder is the home base for your Mac: you use the Finder to organize your folders and files on the Mac. Launch Finder | Settings... Leave all options in Finder Settings but check all checkboxes on Advanced tab:


In View menu check "as Columns" + "Sort By Name". Show all relevant Sidebar, Toolbar, Status options etc:
 View menu | Select the following:
  •  Check "as Columns"
  •  Sort By | Name
  •  Show Sidebar
  •  Show Preview
  •  Show Toolbar
  •  Hide All Tabs
  •  Hide Tab Bar
  •  Show Path Bar
  •  Show Status Bar
  •  Hide View Options
  •  Hide Preview Options

Here are some Windows keyboard shortcut equivalents. *Customization via App Shortcuts as shown below:
 Ctrl + N New Finder Window
 Ctrl + Shift + N New Folder
 Ctrl + O Open File
 Ctrl + Shift + G Go to Folder...
 F2* | Enter Rename File / Folder
 Alt + Backspace Delete File / Folder

Shortcuts: Right click folder | Show in Enclosing folder. Right click folder the Status Bar | Copy as Pathname.

Finally, here are two handy aliases to hide and show private files and folders on Mac via ~/.bash_profile:
 alias showFiles='defaults write com.apple.finder AppleShowAllFiles YES; killall Finder   /System/Library/CoreServices/Finder.app'
 alias hideFiles='defaults write com.apple.finder AppleShowAllFiles NO; killall Finder   /System/Library/CoreServices/Finder.app'

Python
As per this post, Python is installed on most Mac OS/X systems by default. Also, one can install Python when you install Xcode Command Line Tools. Another option is update Python from the official website e.g. v3.12. IMPORTANT: when coding in Python activate the created virtual environment: source .venv/bin/activate.

As per this post, we installed open source Python distribution Anaconda used for data science. However, on the Mac after launch Terminal and enter jupyter notebook you may encounter the following couple errors:

Error #1: Jupyter Notebook 500 : Internal Server Error - follow instructions here to resolve the issue:
 pip install --upgrade jupyterhub
 pip install --upgrade --user nbconvert

Error #2: ModuleNotFoundError: No module named 'jupyter_server.contents' - follow instructions here:
 pip uninstall traitlets
 pip install traitlets==5.9.0
 jupyter notebook
 http://localhost:8889/notebooks

Terminal
The Mac terminal may be zsh by default. However, change your default shell via Settings... | General | Shell open with: Command path /bin/bash or enter chsh -s /bin/bash. Confirm BASH is now in Terminal title!

IMPORTANT: remove silence deprecation warning | Enter the following into Terminal for ~/.bash_profile:
 echo "export BASH_SILENCE_DEPRECATION_WARNING=1" >> ~/.bash_profile

Customize the Mac terminal to always show full directory path as the cursor similar to the Linux terminal:
 echo "export PS1='\u@\h:\w$ '" >> ~/.bash_profile
Finally, keyboard shortcuts like Ctrl + C or Ctrl + Z may not work to break on Mac thus prefer Ctrl + ".".

Homebrew
Homebrew is a package manager for macOS which lets you install free and open-source software using your terminal. Launch terminal and issue the following commands to install Homebrew and update bash_profile:
 /bin/bash -c "$(curl -fsSL https://raw.githubusercontent.com/Homebrew/install/HEAD/install.sh)"
 echo 'eval "$(/opt/homebrew/bin/brew shellenv)"' >> ~/.bash_profile

Install free and open-source software for Cloud Computing for example: minikube, KinD, Helm, Terraform:
 minikube brew install minikube
 KinD brew install kind
 Helm brew install helm
 Terraform brew tap hashicorp/tap | brew install hashicorp/tap/terraform

Cloud CLIs
Download and install Command Line Interfaces for all managed cloud providers e.g.: AWS, Azure, Google: Install the latest version of the AWS CLI. Download the macOS pkg file. Confirm installation aws version. Install Azure CLI on macOS using brew brew update && brew install azure-cli. Confirm install az version. Install the Google Cloud CLI. Download the Apple M1 package. Extract and execute install.sh | gcloud init.

Kubernetes
As per this post, install Kubernetes with Docker Desktop on Mac OS/X. Next, install and setup kubectl on the Mac OS/X. However, the default kubectl autocomplete setup quick reference may produce the following error
 bash: completion: function `__start_kubectl` not found

If you experience this error then here is an alternative approach: first brew install bash bash-completion Set Terminal to use bash: Settings... | General | Shell open with: Command path /opt/homebrew/bin/bash

Finally, update ~/.bash_profile
 alias k="kubectl"
 complete -F __start_kubectl k
 source /opt/homebrew/etc/profile.d/bash_completion.sh
 source <(kubectl completion bash)

BASH Profile
Dump out the contents of the ~/.bash_profile file and verify all the following aliases and commands exist:
 export BASH_SILENCE_DEPRECATION_WARNING=1 # https://support.apple.com/en-us/102360
 export PS1='\u@\h:\w$ ' # Show always fullpath on terminal
 eval "$(/opt/homebrew/bin/brew shellenv)" # brew
 alias d='docker' # Docker
 alias k='kubectl' # Kubernetes
 complete -F __start_kubectl k # Kubernetes autocomplete
 source /opt/homebrew/etc/profile.d/bash_completion.sh # Kubernetes autocomplete
 source <(kubectl completion bash) # Kubernetes autocomplete
 alias sba='source .venv/bin/activate' # Python virtual environment
 alias showFiles='defaults write com.apple.finder AppleShowAllFiles YES; killall Finder   /System/Library/CoreServices/Finder.app'
 alias hideFiles='defaults write com.apple.finder AppleShowAllFiles NO; killall Finder   /System/Library/CoreServices/Finder.app'

Summary
To summarize, by remapping the modifier keys in System Settings has helped tremendously, however this method does not provide a complete one-to-one mapping for all keyboard shortcuts from Windows to Mac.

Another option is investigate global hotkeys in App Shortcuts for All Applications and specific Applications.


However, this could be extremely time-consuming and unsuccessful thus will keep the setup as is for now. Therefore, he is short list of mismatched keyboard shortcuts going forward and new key combos to learn:
 General Ctrl + H Hide current window of this front app
 General Ctrl + M Minimize all open windows to the Dock
 General Ctrl + 1 Restoring minimized window from Dock
 General Ctrl + ` Move focus to next window of same app
 General Win + Tab Use instead of default Ctrl + Tab option
 Applications Ctrl + Enter Save current open document then exit

After aligning keyboard shortcuts from Windows to Mac the next step is to transfer Application navigation! This will be the topic of the next post.

Monday, January 1, 2024

Retrospective XV

Last year, I conducted a simple retrospective for 2022. Therefore, here is a retrospective for 2023.

2023 Achievements
  • Complete fifteen year blog on agile software application to game development and beyond
  • Enter Lil Evel Knievel in SMS Power! 2023 competition as side scrolling Wonderboy tribute
  • Port Sega Master System games to Sega MegaDrive then document development process
  • Apply Sega Master System development techniques to eBPF setup using C code examples
  • Resurrect test driven development and mock integration into Linux / C environment setup
  • Transition 8-bit Sega Master System development setup to the Nintendo Game Boy+Color
  • Prepare Python environs for OpenAI retro video game Reinforcement Learning integration
  • Experiment with SerenadeAI and prototype ChatGPT APIs across multiple language range

Note: leveraging Sega Master System development setup for Nintendo Game Boy is an achievement!

2024 Objectives
  • Resume Microservices application development and deploy across Distributed Systems at scale
  • Apply Infrastructure as Code and adopt DevOps best practices as software grows in complexity
  • Extend Software Engineering experience across Design + Architectural responsibilities in Cloud
  • Integrate Artificial Intelligence to Software projects: Machine, Deep or Reinforcement Learning

Architecture
Software architecture plays crucial role in designing + developing effective software systems. Understanding various architectural styles + patterns available, you can make informed decisions in architectural endeavors to create scalable, maintainable, and reliable software solutions. Architectural styles are high-level strategies that provide an abstract framework for a family of systems e.g. Layered, Event-Driven, and Microservices.


Architect Types
Software architects, solution architects and enterprise architects all play a part in designing, developing and implementing solutions that meet the needs of the business but differ with technical, company and IT focus:
 Software
 Architect 
 A professional who designs and oversees the development of each software system.
 Ensures that the system meets the needs of the business and is technically feasible.
 Solution
 Architect 
 A professional who designs and implements solutions that meet needs of the business.
 They have a deep understanding of both the business and the technology landscapes.
 Enterprise
 Architect 
 A professional who designs and oversees the overall IT architecture of an organization.
 Ensures architecture aligned with business strategy and supports goals and objectives.


Cloud Variants
Cloud computing is becoming common for accessing data and using appliations in web-based environments. Growing demand for technology solutions in this area request need for cloud architects and cloud engineers:
 Cloud
 Architect 
 A professional who deploys cloud-based applications according to business specifications.
 Architects focus work on the frameworks and infrastructure of cloud-based applications.
 Cloud
 Engineer 
 A professional who designs, creates and develops cloud-based systems and solutions.
 Involved in building and testing technical requirements within all these cloud systems.


Microservices
Microservices have become a game-changer in the quickly changing technological landscape where flexibility, speed and scalability are crucial. Microservices architecture provides a more agile and effective substitute to conventional monolithic techniques and has seen rapidly increasing industry adoption in recent years.

Microservices align seamlessly with DevOps principles, fostering development and operations collaboration for continuous delivery and automation. Microservices architecture also aligns with containerization and orchestration tools like Kubernetes, simplifying the deployment and management of services at scale.

Industry predictions in Microservices expect growth to $1.7b by 2028 as 82% of organizations plan to adopt microservices in the next 3yrs. Microservices are well-suited to leverage emerging technologies such as IoT, edge computing, and blockchain and A.I. has potential to disrupt and innovate in the microservices space.


Future
The Top Tech Skills for 2024 corroborates this as specialization in the cloud computing market is predicted to grow at an annual rate of 18% plus Artificial Intelligence and Machine Learning continue to drive innovations across all industries including using AI in Microservices; AI is becoming an essential part of the microservices ecosystem, enabling businesses to build and maintain large, complex applications more efficiently. It will be interesting to see new innovative ways in which AI may integrate across the Software Engineering spectrum!

Wednesday, November 15, 2023

GBDK Programming Sample

In the previous post, we checked out GBDK Programming Setup. The GBDK is a cross-platform development kit for sm83, z80 and 6502 based gaming consoles including the Nintendo Game Boy and Game Boy Color.

Using the GBDK, it is now possible to write game code using the C language rather than pure Z80 assembly. Therefore, we would like to extend this knowledge and checkout some code samples and homebrew games.

Let's check it out!

Software
Follow all instructions from the previous post: this documents how to setup all the pre-requisite software.
Note: ensure you have downloaded and installed the GBDK devkit and Small Device C Compiler [SDCC].

Examples
As per the previous post, after the GBDK has been downloaded, installed and setup, we should now checkout C:\gbdk\examples\gb to learn more about APIs available in the devkit. Replicate prior Hello World example.

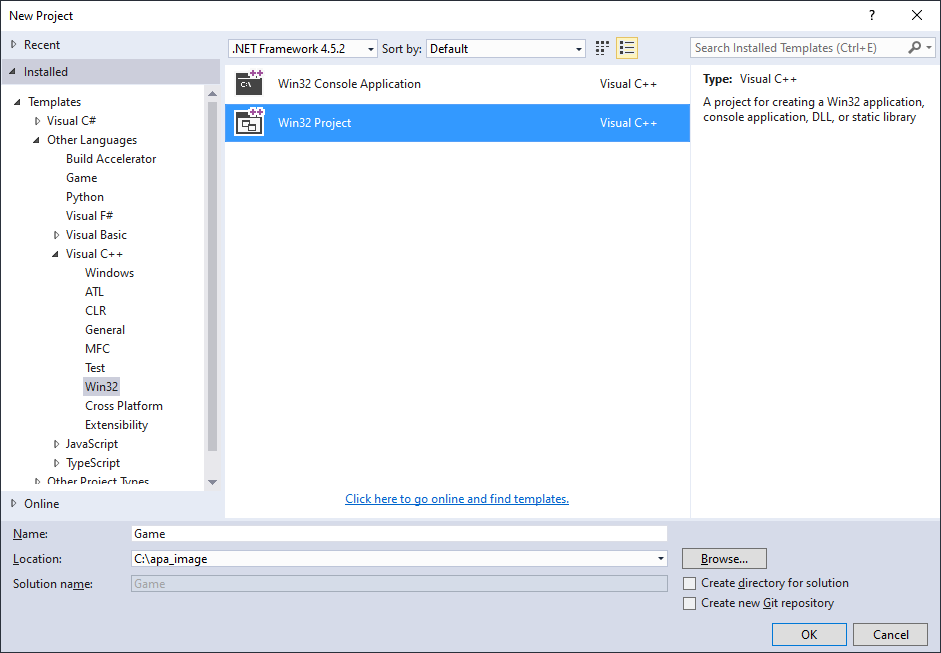
Launch Visual Studio 2015. File | New | Project... | Visual C++ | Win32 | Win32 Project
 Name:  Game
 Location:  C:\apa_image
 Create directory for solution  UNCHECKED

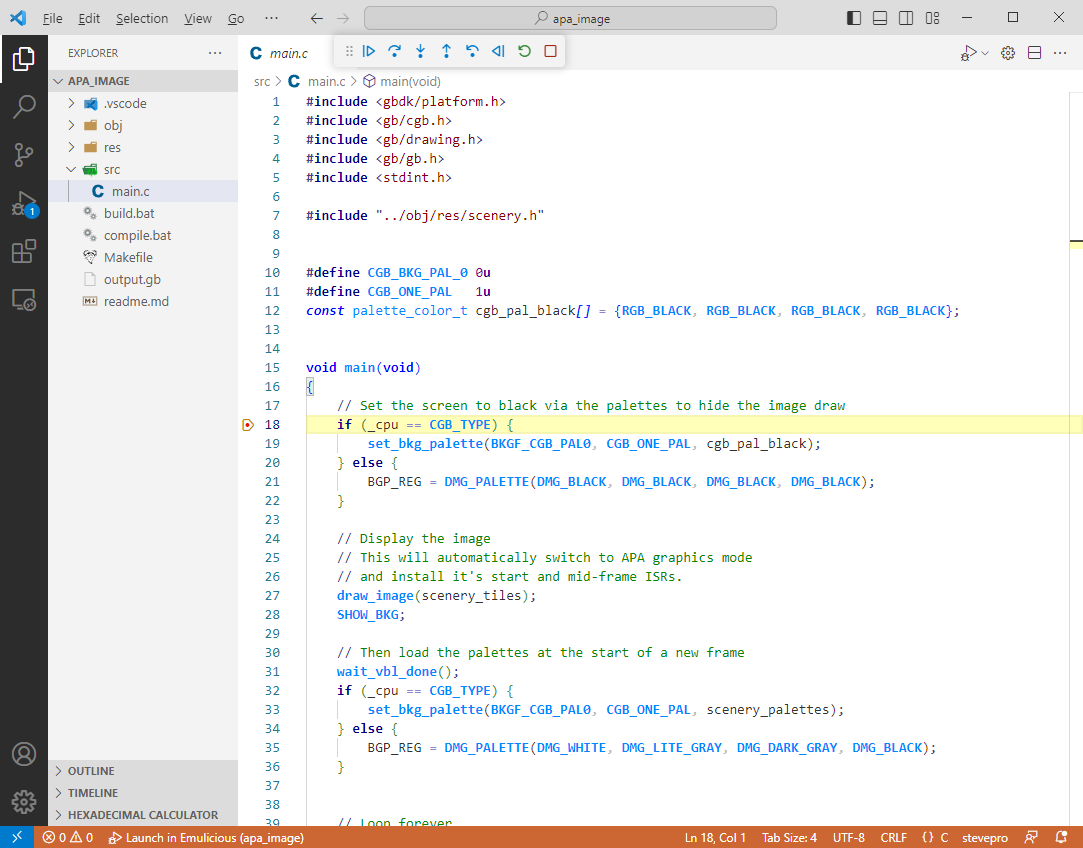
Copy over all original folders and files from the corresponding example. Copy from prior Hello World example the hidden .vscode folder and files. Copy also build.bat and align with source compile.bat file. Add relevant files to Visual Studio 2015. Press Ctrl+1 to build, link and run code similar to the prior Hello World example!

Launch Visual Studio Code. Open example folder. Set breakpoint in main.c. Press F5 to debug step thru code


Here is the complete list:
 CUSTOM: apa_image SOURCE: apa_image
 CUSTOM: banks SOURCE: banks
 CUSTOM: bcd SOURCE: bcd
 CUSTOM: colorbar SOURCE: colorbar
 CUSTOM: comm SOURCE: comm
 CUSTOM: crash SOURCE: crash
 CUSTOM: dscan SOURCE: dscan
 CUSTOM: filltest SOURCE: filltest
 CUSTOM: galaxy SOURCE: galaxy
 CUSTOM: gb-dtmf SOURCE: gb-dtmf
 CUSTOM: gbcompress SOURCE: gbcompress
 CUSTOM: incbin SOURCE: incbin
 CUSTOM: irq SOURCE: irq
 CUSTOM: isr_vector SOURCE: isr_vector
 CUSTOM: large_map SOURCE: large_map
 CUSTOM: lcd_isr_wob SOURCE: lcd_isr_wob
 
 CUSTOM: linkerfile SOURCE: linkerfile
 CUSTOM: metasprites SOURCE: metasprites
 CUSTOM: paint SOURCE: paint
 CUSTOM: ram_function SOURCE: ram_function
 CUSTOM: rand SOURCE: rand
 CUSTOM: rpn SOURCE: rpn
 CUSTOM: scroller SOURCE: scroller
 CUSTOM: sgb_border SOURCE: sgb_border
 CUSTOM: sgb_multiplay SOURCE: sgb_multiplay
 CUSTOM: sgb_pong SOURCE: sgb_pong
 CUSTOM: sgb_sfx SOURCE: sgb_sfx
 CUSTOM: simple_physics SOURCE: simple_physics
 CUSTOM: sound SOURCE: sound
 CUSTOM: temp_minimal SOURCE: temp_minimal
 CUSTOM: temp_subfolder SOURCE: temp_subfolder
 CUSTOM: wav_sample SOURCE: wav_sample

Samples
Gaming Monsters YouTube channel has many samples to teach how to develop your own GameBoy games:

Launch Visual Studio 2015. File | New | Project... | Visual C++ | Win32 | Win32 Project
 Name:  Game
 Location:  C:\SimpleSprites
 Create directory for solution  UNCHECKED

Copy over all original folders and files from the corresponding example. Copy from prior Hello World example the hidden .vscode folder and files. Copy also build.bat and align with source's make.bat file. Add relevant files to Visual Studio 2015. Press Ctrl+1 to build, link and run code similar to the prior Hello World example!

Launch Visual Studio Code. Open example folder. Set breakpoint in main.c. Press F5 to debug step thru code


Here is the complete list:
 CUSTOM: helloworld SOURCE: helloworld
 CUSTOM: simplesprites SOURCE: simplesprites
 CUSTOM: movesprites SOURCE: movesprites
 CUSTOM: background SOURCE: background
 CUSTOM: window SOURCE: window
 CUSTOM: sound SOURCE: sound
 CUSTOM: noise SOURCE: noise
 CUSTOM: simplejumping SOURCE: simplejumping
 CUSTOM: metasprites SOURCE: metasprites
 CUSTOM: spritecollision SOURCE: spritecollision
 CUSTOM: bkgdcollision SOURCE: bkgdcollision
 
 CUSTOM: splashscreens SOURCE: splashscreens
 CUSTOM: fadeeffects SOURCE: fadeeffects
 CUSTOM: keyboard SOURCE: keyboard
 CUSTOM: savename SOURCE: savename
 CUSTOM: colorsprites SOURCE: colorsprites
 CUSTOM: backgrounds SOURCE: backgrounds
 CUSTOM: makingmusic SOURCE: makingmusic
 CUSTOM: spritetricks SOURCE: spritetricks
 CUSTOM: scrolling SOURCE: scrolling
 CUSTOM: debugging SOURCE: debugging
 CUSTOM: platformer SOURCE: platformer

Homebrew
Larold's Jubilant Junkyard is a website/blog/shop which focuses on creating digital products including game development projects and tutorials. The Nintendo GameBoy development tutorial series is very educational.

Follow Larold's Jubilant Junkyard YouTube video channel for additional GBDK 2020 information and content:
 SCREEN resolution  20 x 18 tiles  160 x 144 pixels
 BACKGROUND  32 x 32 tiles  256 x 256 pixels

Compiler flags
 -Wm-yc  GameBoy Color compatible  NB: lowercase c
 -Wm-yC  GameBoy Color only  NB: uppercase C
 -Wm-ys  Super GameBoy compatible  

GameBoy Color Tile Attributes
 Bit 7  priority flag  0: tiles below sprites, 1: tiles above sprites
 Bit 6  vertical flip  0: tiles normal, 1: flipped vertically
 Bit 5  horizontal flip  0: tiles normal, 1: flipped horizontally
 Bit 4  not used  
 Bit 3  character bank specification  0: tiles at bank0, 1: tiles at bank1
 Bit 2  see bit 0  
 Bit 1  see bit 0  
 Bit 0  bits 0-2  indicate tile color palette assignment

Launch Visual Studio 2015. File | New | Project... | Visual C++ | Win32 | Win32 Project
 Name:  Game
 Location:  C:\AlleywayGameboy
 Create directory for solution  UNCHECKED

Copy over all original folders and files from the corresponding example. Copy from prior Hello World example the hidden .vscode folder and files. Copy also build.bat and align with source's make.bat file. Add relevant files to Visual Studio 2015. Press Ctrl+1 to build, link and run code similar to the prior Hello World example!


NOTE: ensure that the GBDK header files are included for Intellisense: Right click project | Properties |
Configuration Properties | C/C++ | General | Additional Include Directories | %GBDK_WIN%/include; $(SolutionDir)/headers/gen; $(SolutionDir)/headers/main; %(AdditionalIncludeDirectories).

Here is the complete list:
 CUSTOM: alleyway  SOURCE: alleyway
 CUSTOM: flappy-bird  SOURCE: flappy-bird
 
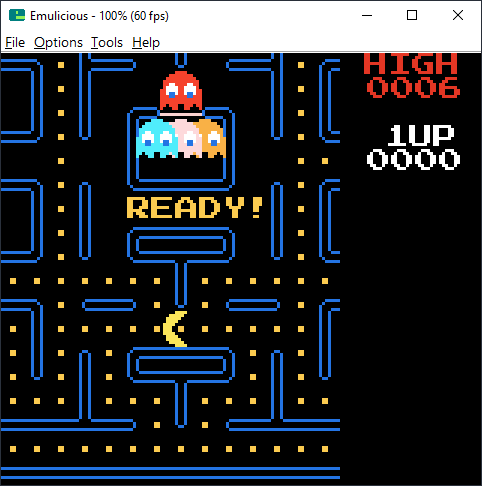
 CUSTOM: pacman  SOURCE: pacman
 CUSTOM: space-invaders  SOURCE: space-invaders

Summary
Armed with all this knowledge, we are now in an excellent position to build complete video games for the Nintendo Game Boy and Game Boy Color. In the interim, we see the GameBoy Competition 2023 is here!

Friday, September 15, 2023

GBDK Programming Setup

In 2017, we checked out devkitSMS Programming Setup to build 8-bit video games for Sega Master System. Here we installed all the tools required including a powerful emulator: Emulicious to test the video games.

Emulicious is a free multi-system emulator popular for Sega Master System and Sega Game Gear games but can also play Nintendo Game Boy and Game Boy Color games. Therefore, let's leverage Sega Master System development setup to build and test games for Nintendo Game Boy and Game Boy Color using the GBDK.

Let's check it out!

GDDK
The GBDK is a cross-platform development kit for sm83, z80 and 6502 based gaming consoles including the Nintendo Game Boy and Game Boy Color. It includes libraries, toolchain utilities and SDCC C compiler suite.

Software
Follow all instructions from the previous post: this documents how to setup the pre-requisite software.

Here is a summary of all required software to be installed:
 Name Version
 C IDE Editor Visual Studio 2015
 C IDE Editor Visual Studio Code
 Cross compiler Small Device C Compiler
 
 Name Version
 Make files Cygwin
 Emulators Emulicious, BGB
 Debugger Emulicious Debugger
Note: this post documents how to download and install SDCC v4.1.0 on both Windows and Linux.

GBDK
Navigate to the gbdk-2020 repository on github: gbdk-2020 has full instructions here. Download the latest release from gbdk-2020 archive e.g. gbdk-4.1.1 or git clone latest source code. Extract code into C:\gbdk.

Setup the following environment variable for GBDK_WIN as it can be useful throughout GBDK development. Add the following one environment variable: System | Advanced system settings | Environment Variables:
 Variable  Value  Description
 GBDK_WIN  C:\gbdk  Windows path format


Example
As an example, let's write a simple program that prints Hello World to the screen using the GameBoy DevKit. Create new directory: C:\HelloWorld. Create new file main.c. Copy in the following code to print Hello World.

main.c
#include <gb/gb.h>
#include <stdio.h>

void main()
{
	printf( "HELLO WORLD" );
}

Build
Manually compile and link the Hello World program. Launch command prompt: Start | Run | cmd.


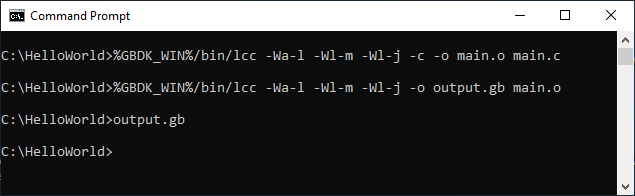
Change directory cd C:\HelloWorld. Next, execute the following 2x commands (in bold):
 ACTION  COMMAND  OUTPUT
 Compile   %GBDK_WIN%/bin/lcc -Wa-l -Wl-m -Wl-j -c -o main.o main.c  main.o
 Link  %GBDK_WIN%/bin/lcc -Wa-l -Wl-m -Wl-j -o output.gb main.o  output.gb

Finally, type output.gb. The Hello World program should launch in the Emulicious emulator.
Congratulations! You have just written your first test program using the GameBoy DevKit.

IMPORTANT
If game does not initially render correct then select Options menu | System | Game Boy or Game Boy Color.

Automate
Let's automate the build process: create C:\HelloWorld\build.bat script file that contains the commands:
@echo off
%GBDK_WIN%/bin/lcc -Wa-l -Wl-m -Wl-j -c -o main.o main.c
%GBDK_WIN%/bin/lcc -Wa-l -Wl-m -Wl-j -o output.gb main.o
output.gb

Visual Studio 2015
Similar to Sega Master System development using devkitSMS, setup Visual Studio 2015 as per instructions here. Also, follow instructions here to connect Ctrl+1 hot key to automatically compile, link and run code.

Launch Visual Studio 2015. File | New | Project... | Visual C++ | Win32 | Win32 Project
 Name:  HelloWorld
 Location:  C:\
 Create directory for solution  UNCHECKED

 Application type:  Console application
 Additional options:  Empty project CHECKED

Navigate to C:\HelloWorld. Add existing: main.c and build.bat at the same folder level as HelloWorld.sln.


Finally, ensure that the GBDK header files are included for Intellisense: Right click project | Properties |
Configuration Properties | C/C++ | General | Additional Include Directories | %GBDK_WIN%/include.

Press Ctrl+1 to build, link and run!


Visual Studio Code
Similar to Sega Master System development using devkitSMS, setup Visual Studio Code as per instructions here. Add hidden .vscode folder + include tasks.json and launch.json files beneath to build + debug code.

Launch Visual Studio Code. Open folder C:\HelloWorld. Add the .vscode folder the following files beneath:

c_cpp_properties.json
{
  "configurations": [
    {
      "name": "stevepro",
      "intelliSenseMode": "clang-x64",
      "includePath": [
        "${env:GBDK_WIN}/include"
      ],
      "cStandard": "c11",
      "cppStandard": "c++17",
      "browse": {
        "path": [
          "${workspaceFolder}"
        ],
        "limitSymbolsToIncludedHeaders": true,
        "databaseFilename": ""
      }
    }
  ],
  "version": 4
}

tasks.json
{
    "version": "2.0.0",
    "label": "build",
    "type": "shell",
    "windows": {
        "command": "./build.bat"
      },
    "presentation": {"echo": true, "reveal": "always", "focus": false, "panel": "shared", "showReuseMessage": false, "clear": true},
    "group": {"kind": "build", "isDefault": true},
}

launch.json
{
    "version": "0.2.0",
    "configurations": [
        {
            "type": "emulicious-debugger",
            "request": "launch",
            "name": "Launch in Emulicious",
            "program": "${workspaceFolder}/output.gb",
            "port": 58870,
            "stopOnEntry": false,
        }
    ]
}

Open main.c. Set breakpoint. Press Ctrl + Shift + B to build source code. Press F5 to debug step thru code:


In Emulicious, choose Tools menu | Debugger to be able to fully debug step thru the Z80 assembly code:


Summary
Now the GBDK has been downloaded, installed and setup, we should checkout C:\gbdk\examples\gb to learn more about the APIs available in the devkit + checkout some code samples and complete homebrew games. This will be the topic of the next post.
Thursday, August 31, 2023

eBPF Programming Sample

In the previous post, we checked out eBPF Programming Setup. Extended Berkeley Packet Filter [eBPF] is technology that runs sandboxed programs in privileged context like the OS kernel to safely and efficiently extend the capabilities of the kernel at runtime without requiring changes to the kernel source code. One issue is there are currently limited methods to debug BPF programs thus we'd like to explore test options.

Let's check it out!

Software
Follow all instructions from the previous post to install CLion and VS Code on Ubuntu Linux. Also install the following components for low level C code unit testing, mocking and integration: Unity, CMock, Ceedling.
 Unity   Unit testing framework built for C projects with a focus on working with embedded toolchains
 CMock   Mock and stub generator and runtime for unit testing C designed to work smoothly with Unity
 Ceedling   Build system for C projects using Ruby Rake [make] build system to integrate Unity + CMock

Pre-requisites
As above, Ceedling requires Ruby installed otherwise sudo: gem: command not found errors may be thrown. Also, CMock requires Ruby bundle be installed otherwise Command 'bundle' not found errors may be thrown.
 sudo apt install ruby  sudo apt install ruby-bundler

Unity
Unity is a unit testing framework built for C, with a focus on working with embedded toolchains, which we would like to try and leverage for BPF development. Follow instructions here to install and configure Unity.
 git clone git@github.com:ThrowTheSwitch/Unity.git
 cd Unity
 cmake .
 make
 sudo make install
 sudo cp libunity.a /usr/local/lib
 sudo cp src/unity*.h /usr/local/include/unity


CMock
CMock is a mock and stub generator designed to work smoothly with Unity. CMock automagically parses the C headers and creates useful mock interfaces used for unit testing. Follow instructions here to install CMock.
 git clone --recursive https://github.com/throwtheswitch/cmock.git
 cd cmock
 bundle install


Ceedling
Ceedling is a build system for C projects using Ruby Rake [make] build system. Ceedling also makes TDD Test Driven Development simple by integrating CMock + Unity. Follow instructions here to install Ceedling.
 ruby -v
 sudo gem install ceedling


Hello Unity
In the previous post, examples installed the libbpf C-based library. Therefore, extend an example and write tests that invoke simple libbpf APIs, for example, libbpf_num_possible_cpus directly using Unity framework.

Launch CLion | New Project | C Executable | Location: /home/stevepro/HelloUnity | Language std: C11

Create

Organize src and test directory structure. Install libbpf beneath src folder. Rename main.c to all_tests.c and move beneath test folder. Update all prod and unit test code. Complete CMakeLists.txt to include library files:
 cmake_minimum_required(VERSION 3.19)
 project(HelloUnity C)
 set(CMAKE_C_STANDARD 11)
 
 include_directories(src/ /usr/local/include/unity/ src/include/libbpf/src)
 link_directories(/usr/local/lib/ src/include/libbpf/src/amd64)
 
 file(GLOB CODE_FILES src/*.c)
 file(GLOB TEST_FILES test/*.c)
 add_executable(HelloUnity ${CODE_FILES} ${TEST_FILES} )
 target_link_libraries(HelloUnity unity bpf elf z)

Edit configurations | Run with root privileges | Set breakpoints | Press F5 to debug step thru source code.


Hello CMock
At the time of writing, there is currently no way to debug BPF programs' source code interactively. Therefore, we would like to attempt to mock BPF programs or at least underlying C sourc code somehow using CMock.

Follow the example Spin up CMock. This article uses Ceedling to automate project setup and generate mocks but we will complete the following manually first to better understand the process. Original code found here.

Open folder /home/stevepro/HelloCMock. Copy inc/rectangle.h + project.yml. Execute mock command:
 ruby ~/GitHub/ThrowTheSwitch/cmock/lib/cmock.rb -oproject.yml inc/rectangle.h

This creates mocks folder two corresponding files: mock_rectangle.h and mock_rectangle.c. Notice we did not attempt to use CLion as is not currently integrated; any attempt may produce Multiple Definition issue!


Hello Ceedling
Complete previous example but this time try Ceedling using the article as a guideline: Launch the Terminal:
 cd $HOME
 ceedling new HelloCeedling

Copy all project files into src and test directories. Include inc and update project.yml with the inc directory:
  :paths:
  :test:
    - +:test/**
    - -:test/support
  :source:
    - src/**
  :include:
    - inc/**
  :support:
    - test/support
  :libraries: []

Run tests manually simply by typing ceedling

Debug tests interactively with GDB as follows: Launch VS Code. Press F5 to add launch.json file to complete:
{
    "version": "0.2.0",
    "configurations": [
        {
            "name": "ceedling_gdb",
            "type": "cppdbg",
            "request": "launch",
            "program": "${workspaceFolder}/build/test/out/test_shape_container.out",
            "args": [],
            "stopAtEntry": false,
            "cwd": "${workspaceFolder}",
            "environment": [],
            "externalConsole": true,
            "MIMode": "gdb",
            "miDebuggerPath": "/usr/bin/gdb",
            "setupCommands": [
                {
                    "description": "Enable pretty-printing for gdb",
                    "text": "-enable-pretty-printing",
                    "ignoreFailures": true
                }
            ]
        }
    ]
}
Set breakpoint in test_shape_container.c | Press F5 to debug step thru source code:


Summary
According to ChatGPT, eBPF is versatile technology that allows safe and efficient code execution within the Linux kernel without requiring modification of kernel code. This feature makes it attractive for applications including network packet filtering, security, logging + tracing, monitoring, and performance optimization.

In summary, while eBPF is a valuable addition to the Linux ecosystem, it is not expected to replace kernel development. Instead, eBPF complements this by currently providing a flexible and efficient way to extend specific kernel features. Therefore, it will be interesting to see if this technology is dominant in the future.