

Let's check K8s out!
Tools
Here are some commonly used tools that can be installed to work with + help manage Kubernetes clusters:
| kubectl | Command-line tool to run commands against Kubernetes clusters |
| minikube | Runs a single-node Kubernetes cluster on your personal computer |
| kind | Runs Kubernetes on your local computer inside Docker containers |
| kubeadm | Used to create and manage and secure larger Kubernetes clusters |
Installation
Install Kubernetes with Docker Desktop on Windows and Mac OS/X. Install Kubernetes on Linux accordingly.
Minikube
Here are instructions how to get Kubernetes running locally as single node cluster on Ubuntu with Minikube:
# Prerequisites
sudo apt install cpu-checker && sudo kvm-ok
sudo apt install libvirt-clients libvirt-daemon-system qemu-kvm \
    && sudo usermod -a -G libvirt $(whoami) \
    && newgrp libvirt

sudo virt-host-validate
curl -LO https://storage.googleapis.com/kubernetes-release/release/$(curl -s https://storage.googleapis.com/kubernetes-release/release/stable.txt)/bin/linux/amd64/kubectl \
    && sudo install kubectl /usr/local/bin && rm kubectl

curl -LO https://storage.googleapis.com/minikube/releases/latest/docker-machine-driver-kvm2 \
    && sudo install docker-machine-driver-kvm2 /usr/local/bin/ && rm docker-machine-driver-kvm

curl -LO https://storage.googleapis.com/minikube/releases/latest/minikube-linux-amd64 \
    && sudo install minikube-linux-amd64 /usr/local/bin/minikube && rm minikube-linux-amd64

minikube version
minikube start

KinD
Kubernetes in Docker [KinD] allows an approach to run a full Kubernetes cluster using Docker containers to simulate multiple Kubernetes nodes operating all at once instead of running everything in virtual machines.
Assume Go installed. Launch Terminal. Enter commands to install KinD. Export path in ~/.bashrc and reboot:
go get sigs.k8s.io/kind # Add KinD to $PATH in ~/.bashrc export PATH="$PATH:~/go/bin/" sudo reboot |
# Create test and delete cluster kind create cluster --wait 5m \ export KUBECONFIG="$(kind get kubeconfig-path)" kubectl cluster-info kind delete cluster |
kubeadm
kubeadm is another tool built to provide a fast path for creating Kuberentes clusters. kubeadm performs all actions to get a minimum viable cluster up and running. Once installed you can then create the K8s cluster.
sudo apt-get update
sudo apt-get install -y apt-transport-https ca-certificates curl

sudo curl -fsSLo /usr/share/keyrings/kubernetes-archive-keyring.gpg https://packages.cloud.google.com/apt/doc/apt-key.gpg
echo "deb [signed-by=/usr/share/keyrings/kubernetes-archive-keyring.gpg] https://apt.kubernetes.io/ kubernetes-xenial main" | sudo tee /etc/apt/sources.list.d/kubernetes.list

sudo apt-get update
sudo apt-get install -y kubelet kubeadm kubectl
sudo apt-mark hold kubelet kubeadm kubectl
kubeadm version
Dashboard
Once Kubernetes cluster is setup there are various options to view all resources. Minikube: simply the launch terminal | minikube dashboard. Alternatively, install VS Code Kubernetes extension and view all resources.

KinD dashboard is more involved. Enter these commands to configure KinD dashboard to run in the browser.
kubectl apply -f https://raw.githubusercontent.com/kubernetes/dashboard/v2.1.0/aio/deploy/recommended.yaml
kubectl get pod -n kubernetes-dashboard
kubectl create clusterrolebinding default-admin --clusterrole cluster-admin --serviceaccount=default:default

token=$(kubectl get secrets -o jsonpath="{.items[?(@.metadata.annotations['kubernetes\.io/service-account\.name']==\
'default')].data.token}"|base64 --decode)
echo $token
kubectl proxy
Launch the browser and enter the following URL. Once prompted enter the service token above and click OK.
http://localhost:8001/api/v1/namespaces/kubernetes-dashboard/services/https:kubernetes-dashboard:/proxy
IMPORTANT
If you receive following error: listen tcp 127.0.0.1:8001: bind: address already in use then enter command:
|
netstat -tulnap | grep 8001 sudo apt install net-tools sudo fuser -k 8001/tcp netstat -tulnap | grep 8001 |
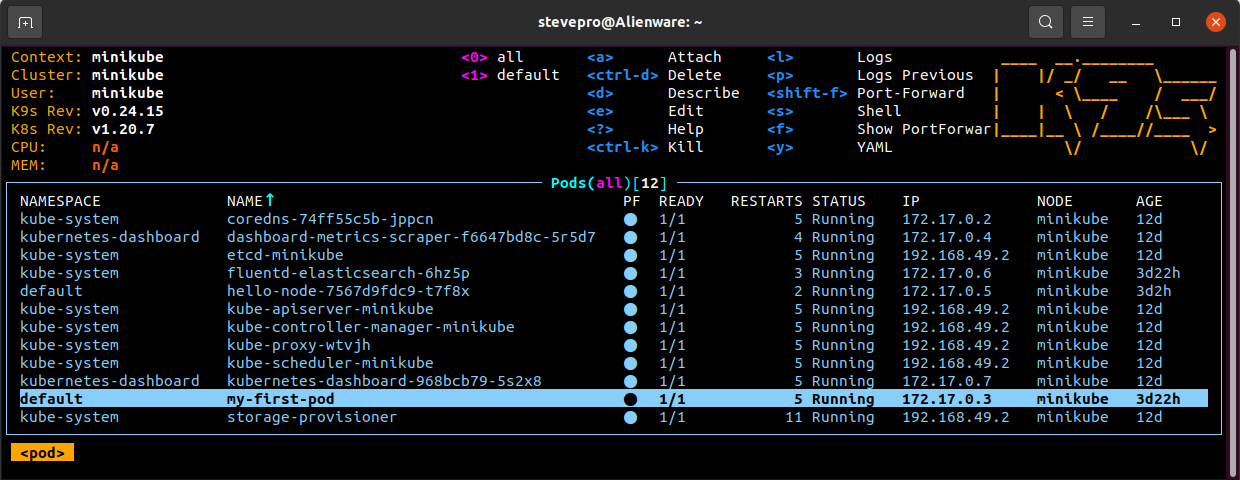
k9s is the Kubernetes CLI to manage clusters. Download the latest binary and extract into /usr/local/bin. You may need to manually create the ~/.k9s folder otherwise you may receive the error Permission denied.
kubectl
Enable auto completion as per the kubectl Cheat Sheet and update ~/.bashrc to alias the kubectl command:
# Auto complete source <(kubectl completion bash) echo "source <(kubectl completion bash)" >> ~/.bashrc |
# Alias kubectl alias k='kubectl' complete -F __start_kubectl k alias kdr='kubectl --dry-run=client -o yaml' |
The Kubernetes cluster configuration file lives at ~/.kube/config. Obtain Kubernetes config + context info:
| kubectl config view | Show Kubernetes cluster configuration |
| kubectl config get-contexts | Show all Kubernetes cluster contexts |
| kubectl config current-context | Show current Kubernetes cluster context |
| kubectl config use-context my-cluster-name | Set default context to my-cluster-name |
| kubectl config set-context --current --namespace=my-ns | Set default context namespace to my-ns |
Definitions
Here is some basic terminology when working with containerized applications running in Kubernetes cluster:
| Namespace | Scope cluster resources and a way to isolate Kubernetes objects |
| Workload | Containerized application running within the Kubernetes cluster |
| Container | Decouples applications from the underlying host infrastructure |
| Pod | Smallest deployable unit as created and managed in Kubernetes |
| Node | Workloads are placed in Containers on Pods to be run on Nodes |
| Replicaset | Maintains stable set of replica pods available running any time |
| Deployment | Provides a declarative way to update all Pods and ReplicaSets |
| Service | Abstract way to expose an application running on set of Pods |
Planes
Networking back in the day would have rules + policies about how to route network packets. These policies would make up the network control plane. The control plane is concerned with establishing network policy. Meanwhile, the data plane is everything else in the network architecture that enforces all network policies.
Control Plane
In Kubernetes, the control plane is the set of components that "make global decisions about the cluster" e.g. scheduling as well as detecting and responding to cluster events e.g. auto scaling pods due to traffic spikes.

Listed are control plane components that run on the master node to keep the cluster in the "desired state":
| Store (etcd) | Key-value backing store for all Kubernetes objects and data info |
| API Server | Exposes the Kubernetes API as the front end for the control plane |
| Controller-Manager | Runs controller processes e.g. Nodes, Jobs, Endpoints + Services |
| Scheduler | Watches for newly created pods and assigns nodes to run them on |
Data Plane
In Kubernetes, the data plane is the set of worker nodes with their pods and containers that enforce all the global decisions made about the cluster from the master node e.g. auto scaling pods due to traffic spikes.

Listed are data plane components that run on each worker node maintaining pods and runtime environment:
| Kubelet | Worker agent that makes sure containers are running inside Pods |
| Container Runtime | Software that is responsible for running containers on worker nodes |
| Kube Proxy | Network proxy that maintains all network rules on the worker nodes |
IMPORTANT
Here are 2x simple commands to get full information about control and data planes for Kubernetes cluster:
| kubectl cluster-info | Kubernetes control plane is running at the designated IP address |
| kubectl cluster-info dump | Full description of all Kubernetes components running in the cluster |
Commands
Here is list of useful commands. Foreach command you can add the --help flag to see more options to pass:
| kubectl get all -A | Get all resources across all namespaces |
| kubectl describe pod my-pod | Get the full YAML declaration for my-pod |
| kubectl get pod my-pod -o yaml | Get the expanded declaration for my-pod |
| kubectl logs -f my-pod | Get logs for my-pod + tail all its updates |
| kubectl get nodes -o wide | List all full details of nodes in namepsace |
| kubectl get deployments -A | List all deployments from all namespaces |
| kubectl get services -A | List all services across all the namespaces |
Tutorial
Hello MiniKube tutorial shows you how to create a sample app on Kubernetes applying the above resources.
| minikube start | Start Minikube cluster |
| minikube dashboard | Launch Minikube dashboard |
| minikube ip | Display Minikube IP address |
| minikube ssh | Secure shell into Minikube node |
| minikube stop | Stop Minikube cluster |
| minikube delete | Delete Minikube cluster |
Create Deployment
|
minikube start
minikube dashboard kubectl create deployment hello-node --image=k8s.gcr.io/echoserver:1.4 kubectl get deployments |
Create Service
|
kubectl expose deployment hello-node --type=LoadBalancer --port=8080
kubectl get services minikube service hello-node |
Exec into Pod
|
kubectl attach hello-node-7567d9fdc9-mblh7 -i
kubectl exec hello-node-7567d9fdc9-mblh7 -- ls / kubectl exec -it hello-node-7567d9fdc9-mblh7 -- /bin/sh kubectl exec --stdin --tty hello-node-7567d9fdc9-mblh7 -- /bin/sh |
Tail Logs
|
kubectl logs -f hello-node-7567d9fdc9-mblh7
minikube stop minikube delete |
Management
The tutorial demonstrates imperative commands using kubectl to operate directly on live Kubernetes objects in the cluster. This is the useful to get started or run one-off tasks however these actions provide no history.
Whereas using declarative object configuration requires configuration files to be stored locally first. All CRUD operations will be detected automatically per Kuberentes object thus configuration can be version controlled.
Example
Code an example from scratch as full end-to-end Web API demo on local host, in Docker and on Kubernetes. Launch Terminal | go mod init testwebapi. Launch VS Code. Enter following code. Press F5 to debug main.go.
| main.go |
 package main
 import (
 	"fmt"
 	"html"
 	"log"
 	"net/http"
 )
 func main() {
 	bind := ":8081"
 	log.Println("Start web server on port", bind)
 	http.HandleFunc("/", func(w http.ResponseWriter, r *http.Request) {
 	  fmt.Fprintf(w, "Hello, %q", html.EscapeString(r.URL.Path))
 	})
 	log.Fatal(http.ListenAndServe(bind, nil))
 }
|
Test main.go: Launch Terminal | curl http://localhost:8081/test. Next, create Dockerfile to build image:
- Ctrl+Shift+P. Choose Docker: Add Docker Files to Workspace...
- Select Application Platform. Choose GoLang
- What port does app listen on? Choose 8081
- Include optional Docker Compose files? Select No
| Dockerfile | |
#build stage FROM golang:alpine AS builder RUN apk add --no-cache git WORKDIR /go/src/app COPY . . RUN go get -d -v ./... RUN go build -o /go/bin/app -v ./... |
#final stage FROM alpine:latest RUN apk --no-cache add ca-certificates COPY --from=builder /go/bin/app /app ENTRYPOINT /app LABEL Name=golang20 Version=0.0.1 EXPOSE 8081 |
In VS Code | Right click Dockerfile | Build Image... Choose name to tag image. Once complete Image will be listed in Docker extension Images list. Expand image built | Run. Refresh Docker extension Containers list.
Test Dockerfile: Launch Terminal | curl http://localhost:8081/test. Lastly, deploy Web API to the cluster. Enter the following YAML as image deployment to local installed cluster and expose the endpoint as service:
| Kubernetes.yaml | |
--- Deployment apiVersion: apps/v1 kind: Deployment metadata: name: testwebapi spec: replicas: 1 selector: matchLabels: app: testwebapi template: metadata: labels: app: testwebapi spec: containers: - name: testwebapi image: stevepro/testwebapi:1.0 imagePullPolicy: Never resources: limits: memory: "128Mi" cpu: "500m" ports: - containerPort: 8081 |
--- Service apiVersion: v1 kind: Service metadata: name: testwebapi-service spec: type: NodePort ports: - name: http port: 8082 targetPort: 8081 selector: app: testwebapi |
Minikube
Ensure that Minikube is installed. Launch Terminal | minikube start. Ensure images will be deployed locally:
|
minikube start minikube docker-env eval $(minikube -p minikube docker-env) |
Build the image as above but this time in the local Minikube cluster docker build -t stevepro/testwebapi:1.0 .
Apply the deployment and service YAML using the kubectl. Verify objects created from minikube dashboard.
|
docker build -t stevepro/testwebapi:1.0 . kubectl apply -f Kubernetes.yaml |
Test Kubernetes: Launch Terminal. Execute minikube service testwebapi-service --url to obtain the cluster IP address + port. Build Minikube cluster socket and test the API | curl http://192.168.49.2:30799/test.
|
minikube service testwebapi-service --url curl http://192.168.49.2:30799/test |
Finally, clean up and delete deployment + service YAML after testing complete and destroy Minikube cluster.
|
kubectl delete -f Kubernetes.yaml minikube stop |
KinD
Code an example from above as full end-to-end Web API demo on local host, in Docker and on Kubernetes. Ensure that KinD is installed. Launch Terminal | kind create cluster. Ensure images will be deployed locally:
|
kind create cluster |
Build the image as above but this time in the local KinD cluster as docker build -t stevepro/testwebapi:2.0. Load the newly built local image into KinD cluster. Apply the deployment and service YAML using the kubectl.
|
docker build -t stevepro/testwebapi:2.0 . kind load docker-image stevepro/testwebapi:2.0 kubectl apply -f Kubernetes.yaml |
Test Kubernetes: Launch Terminal. Execute kubectl get nodes -o wide to obtain cluster INTERNAL-IP. Execute kubectl get services to obtain cluster port. Build socket and test | curl http://172.18.0.2:31196/test.
|
kubectl get nodes -o wide kubectl get services curl http://172.18.0.2:31196/test |
Finally, clean up and delete deployment + service YAML after testing complete and destroy the KinD cluster.
|
kubectl delete -f Kubernetes.yaml kind delete cluster |
Source Code
Finally, navigate the Kubernetes source code to familiarize yourself with the code base and debug step thru the source code especially if you would like to participate in any one of the Special Interest Groups [SIGs].
git clone the Kubernetes source code. Launch folder in VS Code. Search for main.go e.g. from ./cmd/cloud-controller-manager. Right click main.go | Open in | Terminal. go build . go run main.go. Press F5 to debug:
git clone https://github.com/kubernetes/kubernetes.git cd kubernetes make find -L -type f -name 'main.go' |
cd ./cmd/cloud-controller-manager go build . go run main.go Press F5 |

Summary
To summarize, Kubernetes has greatly simplified cloud native infrastructure for developers and provides a scalable framework for application deployment. However, just like any new tool or technology, Kubernetes brings with it new security challenges especially due to the ephemeral nature of containerized applications.
Consequently, the Container Network Interface [CNI] initiative was created to define a standardized common interface between container execution and Kubernetes networking layer to address these security concerns.
Thus Kubernetes plugins like Cilium has become the most popular CNI for cluster networking thru definition and enforcement of network policies. Cilium prescribes to which pods can send and receive traffic securely throughout the cluster which becomes critical esp. if Kubernetes adoption continues to grow in the future!
