During development, game code written in Visual Studio can be tested quickly; directly in the Editor. However, game code will eventually need to be deployed, for example, onto an actual mobile device.
Thus, typical programming sequence, especially for mobile, may be something like this:
1. Build (or update) scene in Unity3D.
2. Write game code in Visual Studio.
3. Test game code in Unity3D Editor.
4. Switch platform to mobile device.
5. Build and Run game on device.
6. Rinse and repeat.
The method to switch platform to build and run game code on mobile device can be a lengthy process;
Fortunately, there is a more efficient way to test game code on mobile devices directly: Unity Remote.
Let's check it out!
Unity Remote
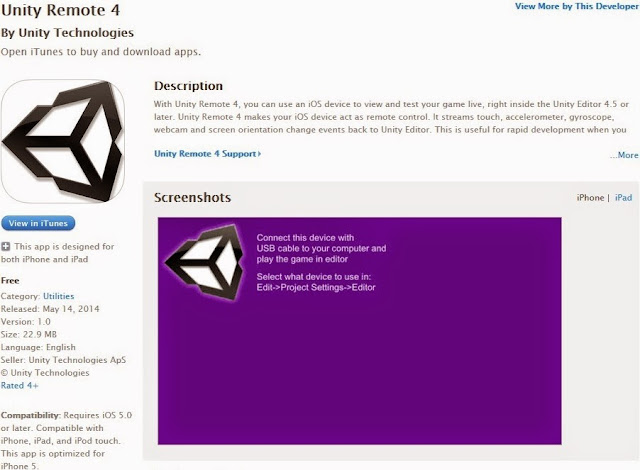
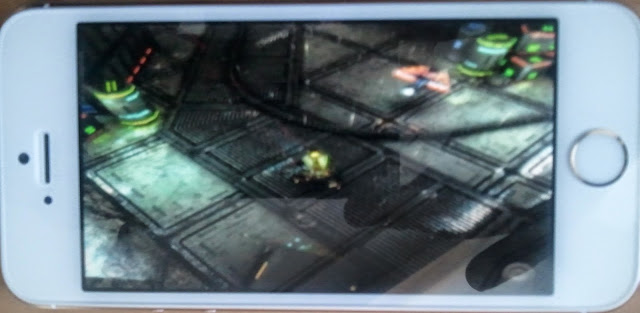
Unity Remote: an application that targets mobile device as remote control for your project in Unity editor. Development is quicker to test through remote control rather than deploy to the device after each change.
At the time of this writing, Unity Remote is available for Android on PC and both Android / iOS on the Mac.
Windows PC
Reference: Unity Remote setup tutorial on You Tube. Outline of steps also available on Unity Answers.
Java SDK
Download Java SDK and install. Unity3D may also require 32-bit JDK installed on 64-bit Windows.
Android Device
Download Unity Remote onto Android device (Samsung Galaxy 4.2.2).
Choose Settings | More (top right) | Developer options and configure.
Ensure the following Developer options are checked:
1. Stay awake.
2. USB debugging.
3. Allow mock locations.
Note: Developer options may be hidden by default! If so then perform the following:
Choose Settings | More (top right) | About device. Tap Build number multiple times.
Android SDK
Download the Android SDK and extract to root folder, for example, D:\Android.
Note: apparently the Unity3D application does not agree with root C:\Android.
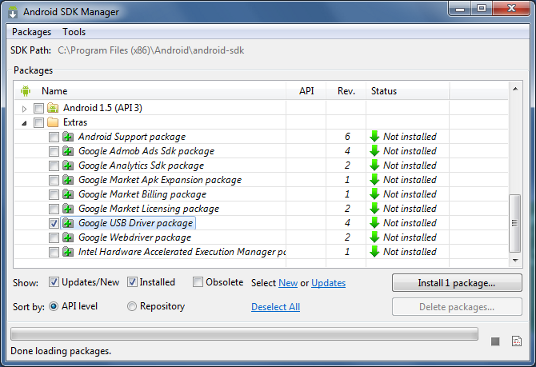
Update any additional Android packages required for all target devices as necessary.
For example, it is standard to install the Android SDK Tools and Google USB Drivers:
Launch Eclipse for Android Developer Tools (ADT) from D:\Android\eclipse\eclipse.exe
Window menu | Android SDK Manager | Select Tools, Android APIs, Extras | Install
Finally, set the Android SDK Location if this has not already been set:
Window menu | Preferences | Android | SDK Location: D:\Android\sdk
Environment Variables
Export environment variables for Android SDK and Android Debug Bridge (ADB) tools:
Right click Computer | Properties | Advanced system settings | Environment Variables.
Add new System variable for name ANDROID_HOME as D:\Android\sdk
Extend to Path System variable: ;%ANDROID_HOME%\platform-tools
Launch command prompt: Windows | Start | Run | cmd. Type "adb devices".
List of devices attached should be empty when no Android device attached.
USB Drivers
Connect Android device to PC; Windows should download and install correct USB drivers automatically.
However, on certain Android devices, you may need to download and install the USB drivers manually.
Navigate to the device manufacturer website and download USB drivers as necessary (e.g. Samsung).
After USB drivers installed, launch command prompt: Windows | Start | Run | cmd. Type "adb devices".
List of devices attached should now include hex code for currently connected Android device (as above).
Finally, launch the Unity Remote application on the device before executing the next step: Unity3D.
Unity3D
Launch Unity3D. Choose to create new project or simply open an existing project.
Edit menu | Preferences | External Tools | Android SDK Location | D:\Android\sdk
In order to run the currently opened scene on the Android device, simply perform the following:
Edit menu | Project Settings | Editor | Unity Remote | Device | Choose Any Android Device
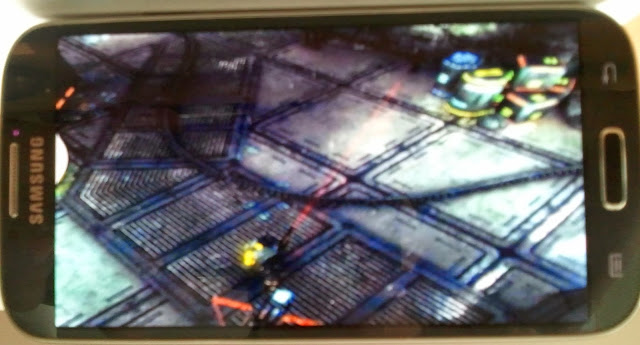
Click the Play button. The game will play directly on Android device as well as in Unity Editor!
Apple Mac
Below are instructions to setup Unity Remote on both Android / iOS devices but this time on the Mac.
Java SDK
Download Java SDK and install. Here, there is typically only one option for the Mac OS X.
iOS Device
Download Unity Remote onto iOS device. No additional configuration should be required.
Android SDK
Download the Android SDK and extract to root folder, for example, to root /Android.
Update any additional Android packages required for all target devices as necessary.
For example, it is standard to install the Android SDK Tools and any relevant Extras.
Launch Eclipse for Android Developer Tools (ADT) via Terminal window:
cd /Android/eclipse/Eclipse.app/Contents/MacOS then execute ./eclipse
Window menu | Android SDK Manager | Select Tools, Android APIs, Extras | Install
Finally, set the Android SDK Location if this has not already been set:
ADT menu | Preferences | Android | SDK Location: /Android/sdk
Environment Variables
Export environment variables for Android SDK and Android Debug Bridge (ADB) tools:
Launch Terminal window. Add new ANDROID_HOME system variable and extend Path.
export ANDROID_HOME=/Android/sdk
export PATH=$PATH:$ANDROID_HOME/platform-tools
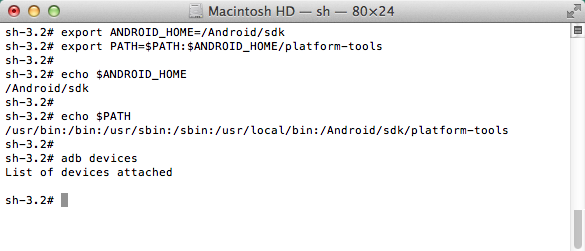
While Terminal window is still open, type in the following: "adb devices".
List of devices attached should be empty when no devices are attached.
USB Drivers
Connect Android / iOS device to Mac. Apple should detect device without any additional configuration.
Launch Terminal window. Type "adb devices". Hex code for connected Android device should be listed.
Finally, launch the Unity Remote application on the device before executing the next step: Unity3D.
Unity3D
Launch Unity3D. Choose to create new project or simply open an existing project.
Unity menu | Preferences | External Tools | Android SDK Location | /Android/sdk
In order to run the currently opened scene on the iOS device, simply perform the following:
Edit menu | Project Settings | Editor | Unity Remote | Device | Choose Any iOS Device
Click the Play button. The game will play directly on iOS device as well as in Unity Editor!
Note: choose Any Android Device for equivalent experience on Android as outlined above.
Conditional Compilation
Unity3D includes preprocessor directives to compile and execute sections of platform dependent code:
#if UNITY_IPHONE
  //Execute script code when Build Settings Platform: iOS.
#endif

#if UNITY_ANDROID
  //Execute script code when Build Settings Platform: Android.
#endif
Note: targeting single code base to multiple devices may benefit from Device Factory implementation.
Therefore, here is full list of all current Unity Remote scenarios:
1. Connect target device(s) to machine
2. Launch Unity Remote on device(s).
3. Launch Unity3D game project.
4. Choose platform + device.
5. Click Play button.
Choose PLATFORM: File menu | Build Settings | Platform | Switch Platform
Choose DEVICE: Edit menu | Project Settings | Editor | Unity Remote | Device
| Unity3D on PC | Choose Any iOS Device | Choose Any Android Device |
| PLATFORM: iOS | Scene NOT render on iOS Execute UNITY_IPHONE code | Scene renders on Android Execute UNITY_IPHONE code |
| PLATFORM: Android | Scene NOT render on iOS Execute UNITY_ANDROID code | Scene renders on Android Execute UNITY_ANDROID code |
| Unity3D on MAC | Choose Any iOS Device | Choose Any Android Device |
| PLATFORM: iOS | Scene will render on iOS Execute UNITY_IPHONE code | Scene renders on Android Execute UNITY_IPHONE code |
| PLATFORM: Android | Scene will render on iOS Execute UNITY_ANDROID code | Scene renders on Android Execute UNITY_ANDROID code |
At the time of this writing, Unity Remote will not work when iOS device attached to PC unfortunately.
Important: pressing play will always execute UNITY_EDITOR code regardless of platform or device!
Summary
Unity Remote does lessen time taken to view constant (minor) changes on target mobile device(s).
However, you will eventually you will need to deploy game code to the device and test directly!
Again, this can be channelled through Unity3D: choose target mobile platform then Build and Run.
On the other hand, the process to build and run once per device can also be a lengthy process.
Therefore, it would be better to package game code once to be deployed to multiple devices.
That is, the process of Automated Builds. This will be the topic in the next post.

