Thursday, May 1, 2014

Unity3D and Visual Studio

Now that XNA is officially dead, many independent game developers have explored various alternatives. Unity3D is one popular replacement: especially as game developers are able to leverage their C# skills.

However, Unity3D uses Mono Develop as default IDE whereas XNA developers are accustomed to using Visual Studio. Fortunately, there is a plugin for Unity that integrates with Visual Studio directly: UnityVS.

Let's check it out!

Licence
Navigate to UnityVS. Click Try UnityVS button to get the 14x day trial licence.

Enter your first name, last name email address and Submit.
Afterwards, you will receive 2x auto-generated emails:
  1. Open the first email and download the zipped attachment: this is the UnityVS licence
  2. Open the second email which will have the credentials required to download UnityVS
Download
Navigate to UnityVS. Sign in using the credentials from the second email.

Choose the version of UnityVS you want to download, e.g.: UnityVS 2012.
Double click the downloaded MSI package as per the installation notes.

Configuration
Create simple project for Unity and Visual Studio configuration using UnityVS plugin:
Launch Unity3D. Create New Project. Check UnityVS 2012.unitypackage option.

Alternatively, Open Project. Choose Assets menu, Import Package, UnityVS 2012.

There should now be the new UnityVS menu available in Unity.
Note: if there isn't then close Unity and re-open accordingly.

Next, open UnityVS from Unity: choose UnityVS menu, Open in UnityVS.
You will be prompted to enter the licence from the first email received.

Debugging
Create simple C# script for Unity and Visual Studio debugging using UnityVS plugin.
Launch Unity3D. Create cube game object and C# script. Drag script file onto cube.

Double click the C# script from Unity to open the file in Visual Studio accordingly.
Check out icon bottom right in Visual Studio: this now connects UnityVS instances.

Debug the script: insert break point in the Update() method. Press F5 to launch.
Click (only) Unity instance. In Unity, press play and code now breaks to debug.

Player Debugging
Extend simple C# script for Unity and Visual Studio player debugging using UnityVS plugin.
Player debugging seems to be more flexible, there are 3x scenarios on how it can be used:

In Unity, choose File menu, Build Settings, PC, Mac & Linux platform.
Check both Development Build and Script Debugging check boxes.

Scenario #1
In Visual Studio, insert break point. Choose Debug menu, Attach Unity Debugger.
In Unity, click Build and Run button and choose file to save (replace if necessary)

In Visual Studio, select the (new) Unity Instance: WindowsPlayer.
Click the Windows Player Play! button. Code now breaks to debug.

Note: if this doesn't break then click Play! button before Unity Instance: WindowsPlayer.

Scenario #2
In Visual Studio, insert break point. Choose Debug menu, Attach Unity Debugger.
Back in Unity, choose File menu, Build & Run. Then the Windows Player launches.

In Visual Studio, select the (new) Unity Instance: WindowsPlayer.
Click the Windows Player Play! button. Code now breaks to debug.

Note: this method always seems to work whereas Scenario #1 seems more volatile.

Scenario #3
In Visual Studio, insert break point. Choose Debug menu, Attach Unity Debugger.
In Windows Explorer, navigate to the saved executable file. Double click the EXE.

In Visual Studio, select the (new) Unity Instance: WindowsPlayer.
Click the Windows Player Play! button. Code now breaks to debug.

Note: this method always seems to work whereas Scenario #1 seems more volatile.

Important: with Player Debugging, it is not necessary to Press F5 in Visual Studio.
Also, with these scenarios it's not possible to Attach to Process from Visual Studio.

Scripting
Finally, many developers who use Visual Studio also integrate ReSharper for keyboard shortcuts.
UnityVS provides similar built-in keyboard shortcuts, especially for Script wizards and navigation.

Summary
UnityVS is a useful plugin that enables debugging of Unity C# script, code navigation and IntelliSense, all within Visual Studio. As Unity3D gains popularity, this affordable plugin may also gain equal popularity!

Wednesday, January 1, 2014

Retrospective V

Last year, I conducted a simple retrospective for 2012. Therefore, here is a retrospective for 2013.

2013 Achievements
Note: emphasis on Sega Machine Code, Z80 Assembly and Console programming!

2014 Objectives
  • Continued focus on native C++ large scale development and general best practices
  • Target mobile development long-term with focus on native C++ for cross platform

In late January 2013, an email was sent to DirectX/XNA MVPs which explained that Microsoft would no longer be maintaining the XNA toolset: XNA would be fully retired effective April 1, 2014 as a result.

While this news was disappointing to independent game developers, the announcement was hardly a shock: there had been no XNA update since late 2011 and many developers at Microsoft had moved.

Console
In November 2013 saw the launch of eighth generation video game consoles which included the Nintendo Wii U, the PlayStation 4 and the Xbox One. These launches also brought much speculation over the future of independent game development and ability to self-publish.

For example: Microsoft announced the ability to run your own code on the Xbox One but without an official program like XNA, it would seem only logical to create a new programming environment and leverage existing investment in WinRT; similar to Metro-style applications on Windows 8.

Consequently, Microsoft now promotes C++ over C# for high performance DirectX graphics and games programming: the only "real" support for DirectX using C# long-term seems constrained to SharpDX.

The focus on C++ here is nothing new: C++ has been the dominant language for commercial game studios for years and is one-of-the-most cost-effective solutions for porting game code cross platform.

This will be an interesting development, so too will be the ever-growing future target platform: Mobile.

Mobile
A new report suggests that mobile revenues are forecast to grow from $39 billion in 2013 to an estimated $79 billion in 2017. The report bases these findings on improvements in monetization strategies combined with more app-based devices like smart watches, which seem fundamental to growth.

Engaging this new online battleground, the biggest challenge may actually be which technology to choose:

HTML5
An initial choice for creating mobile games but because each browser supports the technology differently, efforts are required to adapt code to each supported browser. The same may hold true for PhoneGap too.

Adobe AIR
The future of Adobe AIR seems uncertain like Adobe Flash, it may be doomed as a long-term technology.

Unity 3D
A popular choice for game development, vendors in the gambling sector are also exploring this technology although there is concern on load times for mobile devices which have far less memory and slower CPUs.

MonoGame
The de-facto choice for many XNA developers however there is concern in the on-going development and long-term future of the open-source project. The same may apply for Xamarin; the Mono-based project.

Native
Similar to console game development, C++ may become increasingly popular for cross platform mobile development for apps/games on devices that demand high performance and a smaller memory footprint.

Conclusion
C++ can be leveraged for building native apps on Apple iOS, Google Android, Microsoft Windows Phone 8. It seems best suited for apps that require sophisticated UIs and high performance client-side calculations:

Apple
Objective-C remains Apple's language of choice however the Xcode compiler (LLVM) fully supports C++.

Google
The Android NDK enables parts of an app built using native C++ for self-contained CPU-intensive code.

Microsoft
Windows Phone 8 has full support for C++ and also supports WinRT application development.

Summary
It will be interesting to see if C++ gains popularity as a choice for cross platform mobile development; C++ is currently considered a niche language for mobile development compared to other alternatives.

However, it is always exciting to revisit existing technologies; similar to Sega Retro Gaming last year!

Sunday, September 15, 2013

Sega Console Programming

In the previous post, we checked out Sega Assembly Programming to generate machine code routines that target Sega hardware; specifically Sega SC-3000: an 8-bit home computer based on the Z80 chip.

As an example, we wrote the main loop of a simple "Shoot 'em up" game that simply moves a target sprite around the screen based on user input; preferably the joystick.

However, all assembly programming and machine code written thus far require a BASIC program driver; Cartridge-based video games built for 8-bit Sega Retro Gaming consoles were written in pure assembly!

In this post, we will focus on the Sega Master System which was the last ever 8-bit video game console manufactured by Sega built using the Z80 chip. Techniques here also apply to the SG-1000, however.
Setup
Follow all instructions from Maxim's World of Stuff: this documents how to setup the dev environment.
Download and configure the following software:

Text Editor
Download and install ConTEXT. Download the syntax highlighter file. Save to the Highlighters folder.

Assembler
Recommended is the WLA DX assembler. Download the compiled binaries and extract.
Remember where you extract the contents as unzipped Compile.bat file is used below.

Emulators
If you've been following the Sega Retro Gaming series then you will have Fusion and Meka installed:
- Fusion: popular emulator used to play Sega retro games. Download Fusion364.zip and extract.
- Meka: emulator with some excellent debugging features. Download mekaw073.zip and extract.

Documentation
Includes: Sega Master System documents (SMS docs), Z80 User Manual and WLA DX Manual.

Hello World
Download and extract the obligatory "Hello World":
Launch ConTEXT, that is, double click ConTEXT.exe. Setup ConTEXT to compile, link and run assembler (.asm) files:
Options menu, Environment Options, Execute Keys, click "Add".

F9 - Compile Execute: C:\PathToCompile.bat
Start in: %p      Parameters: %n
Check "Capture console output" box
Check "Scroll console to the last line"
Compile output parser rule: *:%n:%l: *

F10 - Fusion Execute: Fusion.exe
Parameters: "%poutput.sms"
Start in: C:\PathTo\Fusion364

F11 - Meka Execute: mekaw.exe
Parameters: "%poutput.sms"
Start in: C:\PathTo\mekaw073

ConTEXT
In ConTEXT, choose File menu, Open, "Hello World.asm":
Press F9 to compile and link "Hello World.asm".
This generates the "output.sms" binary file.

Press F10 to run Hello World in the Fusion emulator:

Press F11 to run Hello World in the Meka emulator:
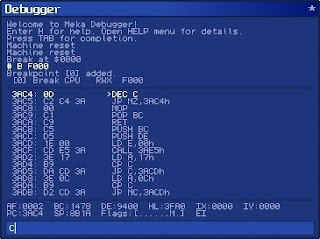
Note: type "C" in the debugger to continue program.

Disassembler
Recommended is the SMS Examine disassembler. Download smsexamine1_2a.zip and extract.
Note: output is recompilable by WLA DX; thus perfect to reverse engineer binary output files.

Disassemble the compiled binary file output.sms that was generated from above.
Create directory "HelloWorld". Copy: Opcodes.dat, output.sms, smsexamine.exe: Start, Run, cmd. cd C:\PathTo\HelloWorld. Type: smsexamine.exe output.sms
This action will generate output.sms.asm and any corresponding data files. Note: output.sms.asm file here is the same as the HelloWorld.asm file above.

Retro Games
Armed with this knowledge, we are now able to disassemble the same retro games we played earlier!
Not only that but we are able to re-assemble the disassembled output and debug through the code:

For example, let's debug through Monaco GP. Download Monaco GP (Japan) (Rev 2).zip and extract.
Create directory "MonacoGP". Copy: "Monaco GP (Japan) (Rev 2).sg", Opcodes.dat, smsexamine.exe. Start, Run, cmd. cd C:\PathTo\MonacoGP. Type: smsexamine.exe "Monaco GP (Japan) (Rev 2).sg"
This action will generate "Monaco GP (Japan) (Rev 2).sg.asm" and any corresponding data files.

Launch ConTEXT. Choose File menu, Open, "Monaco GP (Japan) (Rev 2).sg.asm": Press F9 to compile and link "Monaco GP (Japan) (Rev 2).sg.asm".
This generates the "output.sms" binary file.

Press F10 to run Monaco GP in the Fusion emulator:

Press F11 to run Monaco GP in the Meka emulator:

Note: in Meka we are able to debug through the Monaco GP source assembly code:

Compare machine code in the debugger with the raw binary output file: "Monaco GP (Japan) (Rev 2).sg"

Classic Games
Repeat the process above to disassemble more classic 8-bit Sega retro games:
Year
1983
1984
1986
1987
1987
1987
1989
Game
Congo Bongo
Flicky
The Castle
After Burner
Shinobi
Wonderboy
Golden Axe
Size
24 KB
32 KB
32 KB
512 KB
256 KB
128 KB
512 KB
Console
SG-1000 / SC-3000
SG-1000 / SC-3000
SG-1000 / SC-3000
Sega Master System
Sega Master System
Sega Master System
Sega Master System

Homebrew Games
Homebrew games include any video game built for a games console by an independent game developer under no official company contract; although some consoles are harder to program for than others.

Note: Sega Master System benefits from homebrew development because there is no physical lockout.

Therefore, after reverse engineering Sega retro game code (as above) and learning the intricacies of the hardware, it becomes easier for Indies to build their own versions of classic retro games like Monaco GP.

Summary
This Sega Retro Gaming series has explored programming options for retro games on Sega platforms:
Concluding with Sega Console Programming and Homebrew games, we see that it is feasible to build independent video games on classic 8-bit hardware and produce custom cartridge-based video games.

In fact, many Indies are reviving this classic video game art-form and managing to make money in this niche market: Check out Astro Dodge (2012): first game released for the SG-1000 in almost 30 years.

Goal: build retro game in Z80 assembler to target the Sega SG-1000, SC-3000, or the Master System!

Thursday, August 15, 2013

Sega Assembly Programming

In the previous post, we checked out Sega Machine Code Programming and wrote machine code on a modern-day computer using the Sega emulator Meka and a copy of the Sega BASIC Level 3 ROM.

As an example, we wrote the main loop of a simple "Shoot 'em up" game that simply moves a target sprite around the screen based on user input; preferably the joystick.

However, a machine code program suffers from the disadvantage that it is tedious and cumbersome to manually translate each mnemonic to the corresponding opcode plus calculate all jump relative offsets.

This can be resolved by using assembly language and an assembler to generate machine code routines. Goal: write performance intensive code in assembly language directly and generate the machine code.

Setup
Follow all instructions from previous post to get setup with Sega programming before continuing.

Launch Sega BASIC Level 3 ROM, that is, double click Sega BASIC Level 3 V1 (SC-3000) [b1].sc.
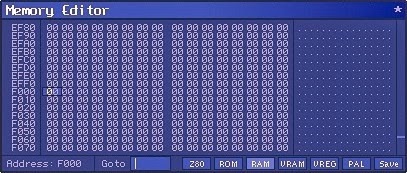
Activate keyboard to begin typing: Inputs menu, Sega Keyboard. Next, open the Memory Editor:
  • Tools menu
  • Memory Editor
  • Click RAM button
  • Type F000
Note: all machine code generated during this post will commence at 16-bit memory address: &HF000.

Tutorial
Type in the following program. Important: ensure you save state before RUN: Main menu, Save State.
Note: file is stored at C:\PathToMeka\Saves\Sega BASIC Level 3 V1 (SC-3000) [b1].S00
10 CALL &HF000
RUN
The program will crash! There are currently no machine code instructions available at address &HF000. Therefore, install an assembler and write assembly language directly to generate the machine code.

Installation
In this post, we target the Sega SC-3000 hardware: an 8-bit home computer based on the Z80 chip.

There are many assemblers available for the Z80 chip but the Z80 Simulator IDE is one of the best:
Also, install Hex Editor program to manipulate the binary data generated from the assembler:
  • Download HxD Hex Editor and extract
  • Double click the setup.exe to install
Launch Z80 Simulator, that is, double click z80simulatoride.exe. Open the Assembler: Tools menu, Assembler. Create a new assembly file: File menu, New.
Type in the following assembly language:
.ORG    0F000H
        RET
Save the assembly file: File menu, Save As, Hello.asm. Generate the machine code: Tools menu, Assemble (F7).

This action will generate 3x new files: Hello.hex, Hello.lst and Hello.obj;
Note: the file that contains the raw binary data is stored in Hello.obj.

Launch the Hex Editor, that is, double click HxD.exe. Open the binary file: File menu, Open, Hello.obj.
Goto &HF000: Search menu, Goto, Offset: F000. Inspect the 16-bit memory address at F000; the hexadecimal &HC9 is stored there.
In the example, &HC9 in hexadecimal is the opcode for the RET instruction above.

Next, copy machine code generated from the assembly above to be consumed in BASIC program:
Select all machine code generated in Hello.obj, that is, from Block F000-F000 and copy (Ctrl-C).

In the Hex Editor, open the save file: File menu, Open, Sega BASIC Level 3 V1 (SC-3000) [b1].S00.
Goto &H706D: Search menu, Goto, Offset: 706D. Paste (Ctrl-V) machine code there, that is &HC9.

Launch Sega BASIC Level 3 ROM, that is, double click Sega BASIC Level 3 V1 (SC-3000) [b1].sc.
Next, load file that was modified above to save machine code into RAM: Main menu, Load State.

Activate keyboard to begin typing: Inputs menu, Sega Keyboard. Next, open the Memory Editor:
  • Tools menu
  • Memory Editor
  • Click RAM button
  • Type F000
Inspect the 16-bit memory address &HF000; the hexadecimal &HC9 will now be stored in RAM there.

Finally, type RUN again. On the surface, nothing appears to happen!
Therefore, check out previous post for machine code fundamentals.

Example
As an example, let's write the main loop of a simple "Shoot 'em up" style game, similar to the previous post, that simply moves a target sprite around the screen based on user input; preferably the joystick.

However, write the main loop in assembly language and generate the machine code routines accordingly.

Sample
The following code sample is reminiscent of the tutorial More on the Joystick and Machine Code Routine.
Follow the tutorial closely to better understand what machine code instructions are required and why.

Type in the following program. Important: ensure you save state before RUN: Main menu, Save State.
Note: file is stored at C:\PathToMeka\Saves\Sega BASIC Level 3 V1 (SC-3000) [b1].S00
10 REM SEGA ASSEMBLY PROGRAMMING
20 GOSUB 300
40 SZ=16:MAG1
60 MR=256-SZ:MD=192-SZ
70 TX=MR/2:TY=MD/2
80 SCREEN 2,2:CLS
90 COLOR,1,(0,0)-(255,191),1
100 REM MAIN LOOP
110 SPRITE 0,(TX,TY),0,9
120 CALL &HF000
130 STOP
300 RESTORE 350
310 FOR S=0 TO 3:READ S$:PATTERN S#S,S$:NEXT S
320 RETURN
350 DATA 000039202100012A, 2A01002120390000
360 DATA 00009C0484008054, 54800084049C0000
RUN
Again, on the surface, nothing appears to happen! Therefore, write the main loop in assembly language:
Launch Z80 Simulator: double click z80simulatoride.exe. Open the Assembler: Tools menu, Assembler.

Create a new assembly file: File menu, New. Type in the following assembly language:
.ORG    0F000H
START:  LD A,9BH
        OUT (0DFH),A
CHECK:  IN A,(0DCH)
        CP 0FFH     ; any movement?
        JR Z,CHECK
LEFT:   CP 0FBH     ; move left?
        JR NZ,RIGHT
        CALL READX
        DEC A
        CALL WRITE
        CALL DELAY
        JR CHECK
RIGHT:  CP 0F7H     ; move right?
        JR NZ,UP
        CALL READX
        INC A
        CALL WRITE
        CALL DELAY
        JR CHECK
UP:     CP 0FEH     ; move up?
        JR NZ,DOWN
        CALL READY
        DEC A
        CALL WRITE
        CALL DELAY
        JR CHECK
DOWN:   CP 0FDH     ; move down?
        JR NZ,SHOOT
        CALL READY
        INC A
        CALL WRITE
        CALL DELAY
        JR CHECK
SHOOT:  CP 0EFH     ; press fire?
        JR NZ,CHECK
        RET
READX:  LD HL,3B01H
        CALL 02C32H
        IN A,(0BEH)
        RET
READY:  LD HL,3B00H
        CALL 02C32H
        IN A,(0BEH)
        RET
WRITE:  CALL 02C44H
        OUT (0BEH),A
        RET
DELAY:  LD A,00H
        LD BC,0300H
LOOP:   DEC BC
        CP B
        JR NZ,LOOP
        JR CHECK
Save the assembly file: File menu, Save As, Code.asm. Generate the machine code: Tools menu, Assemble (F7).

This action will generate 3x new files: Code.hex, Code.lst and Code.obj;
Note: the file that contains the raw binary data is stored in Code.obj.

Launch the Hex Editor, that is, double click HxD.exe. Open the binary file: File menu, Open, Code.obj.
Goto &HF000: Search menu, Goto, Offset: F000. Next, copy machine code generated from the assembly above to be consumed in BASIC program:
Select all machine code generated in Code.obj, that is, from Block F000-F071 and copy (Ctrl-C).

In the Hex Editor, open the save file: File menu, Open, Sega BASIC Level 3 V1 (SC-3000) [b1].S00.
Goto &H706D: Search menu, Goto, Offset: 706D. Paste (Ctrl-V) all copied machine code there.

Launch Sega BASIC Level 3 ROM, that is, double click Sega BASIC Level 3 V1 (SC-3000) [b1].sc.
Next, load file that was modified above to save machine code into RAM: Main menu, Load State.

Important: after load file, it may be necessary to soft reset emulator; press the "Scroll lock" key.
Activate keyboard to begin typing: Inputs menu, Sega Keyboard. Next, open the Memory Editor:
  • Tools menu
  • Memory Editor
  • Click RAM button
  • Type F000
Inspect the 16-bit memory address &HF000; all machine code copied will be now stored in RAM there.
Finally, type RUN again.

The graphics screen clears black and positions a red target sprite. Use the joystick to move target sprite.
Note: de-activate the keyboard to ensure the joystick takes precedence: Inputs menu, Sega Keyboard.

In this example, moving joystick left, right, up, or down moves sprite in that direction. Press fire to quit.
Important: if joystick not configured then try these keys: "J" = left, "M" = right, "7" = up, "U" = down. Experiment with different delay speeds at runtime by manipulating memory directly:
Note: original time delay is 0300 but is stored in memory as 00 03 (Little-endian).
  • Tools menu
  • Memory Editor
  • Click RAM button
  • Type F06B
  • Enter "02" (faster)
  • Enter "04" (slower)
For completeness, here is the disassembled machine code from the tutorial in its entirety:
--------------------------------------------------
Z80    DISASSEMBLER     LISTING
Line   Addr Opcodes     Label   Instruction
--------------------------------------------------
0000   0000             .ORG    0F000H
0001   F000 3E 9B       START:  LD A,9BH
0002   F002 D3 DF               OUT (0DFH),A
0003   F004 DB DC       CHECK:  IN A,(0DCH)
0004   F006 FE FF               CP 0FFH  ; any movement?
0005   F008 28 FA               JR Z,CHECK
0006   F00A FE FB       LEFT:   CP 0FBH  ; move left?
0007   F00C 20 0C               JR NZ,RIGHT
0008   F00E CD 4F F0            CALL READX
0009   F011 3D                  DEC A
0010   F012 CD 61 F0            CALL WRITE
0011   F015 CD 67 F0            CALL DELAY
0012   F018 18 EA               JR CHECK
0013   F01A FE F7       RIGHT:  CP 0F7H  ; move right?
0014   F01C 20 0C               JR NZ,UP
0015   F01E CD 4F F0            CALL READX
0016   F021 3C                  INC A
0017   F022 CD 61 F0            CALL WRITE
0018   F025 CD 67 F0            CALL DELAY
0019   F028 18 DA               JR CHECK
0020   F02A FE FE       UP:     CP 0FEH  ; move up?
0021   F02C 20 0C               JR NZ,DOWN
0022   F02E CD 58 F0            CALL READY
0023   F031 3D                  DEC A
0024   F032 CD 61 F0            CALL WRITE
0025   F035 CD 67 F0            CALL DELAY
0026   F038 18 CA               JR CHECK
0027   F03A FE FD       DOWN:   CP 0FDH  ; move down?
0028   F03C 20 0C               JR NZ,SHOOT
0029   F03E CD 58 F0            CALL READY
0030   F041 3C                  INC A
0031   F042 CD 61 F0            CALL WRITE
0032   F045 CD 67 F0            CALL DELAY
0033   F048 18 BA               JR CHECK
0034   F04A FE EF       SHOOT:  CP 0EFH  ; press fire?
0035   F04C 20 B6               JR NZ,CHECK
0036   F04E C9                  RET
0037   F04F 21 01 3B    READX:  LD HL,3B01H
0038   F052 CD 32 2C            CALL 02C32H
0039   F055 DB BE               IN A,(0BEH)
0040   F057 C9                  RET
0041   F058 21 00 3B    READY:  LD HL,3B00H
0042   F05B CD 32 2C            CALL 02C32H
0043   F05E DB BE               IN A,(0BEH)
0044   F060 C9                  RET
0045   F061 CD 44 2C    WRITE:  CALL 02C44H
0046   F064 D3 BE               OUT (0BEH),A
0047   F066 C9                  RET
0048   F067 3E 00       DELAY:  LD A,00H
0049   F069 01 00 03            LD BC,0300H
0050   F06C 0B          LOOP:   DEC BC
0051   F06D B8                  CP B
0052   F06E 20 FC               JR NZ,LOOP
0053   F070 18 92               JR CHECK
Important: machine code programs will crash if there are errors; they are not as forgiving as BASIC. Therefore, ensure you save state before you RUN machine code programs: Main menu, Save State.

Summary
In this post, assembly programming was introduced to generate machine code to target Sega hardware.

However, all assembly programming and machine code written thus far require a BASIC program driver; Cartridge-based video games built for 8-bit Sega Retro Gaming consoles were written in pure assembly!

This can be resolved by using tools to write to SG-1000, SC-3000, and the Sega Master System directly. This will be the topic in the next post.

Monday, July 15, 2013

Sega Machine Code Programming

In the previous post, we checked out Sega BASIC Programming and wrote some BASIC code on a modern-day computer using the Sega emulator Meka and a copy of the Sega BASIC Level 3 ROM.

As an example, we wrote the main loop of a simple "Shoot 'em up" game that simply moves a target sprite around the screen based on user input; preferably the joystick.

However, games written in BASIC suffer from the disadvantage that they are too slow for applications such as sprite movement; these may be sped up by increasing the step but precision of control is lost.

This can be resolved by using machine code routines for parts of the program where BASIC is too slow.
Goal: apply machine code routines to target Sega hardware directly for speed, efficiency and power.

Setup
Follow all instructions from previous post to get setup with Sega programming before continuing.

Launch Sega BASIC Level 3 ROM, that is, double click Sega BASIC Level 3 V1 (SC-3000) [b1].sc.
Activate keyboard to begin typing: Inputs menu, Sega Keyboard. Next, open the Memory Editor:
  • Tools menu
  • Memory Editor
  • Click RAM button
  • Type F000
Note: all machine code written during this post will commence at 16-bit memory address: &HF000.

Tutorial
Type in the following BASIC code:
10 POKE &HF000, &HC9
RUN
Inspect the 16-bit memory address &HF000; the hexadecimal &HC9 will now be stored in RAM there. Next, add the following line of code:
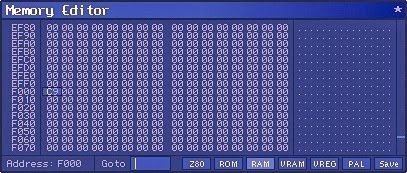
20 PRINT PEEK(&HF000)
RUN
The value 201 will be printed, which is the corresponding decimal value of &HC9, of course.

Finally, change line 20 of code to the following:
20 CALL &HF000
RUN
On the surface, nothing appears to happen! Therefore, let's delve into fundamentals of machine code:

Fundamentals
Machine code is a set of instructions executed directly by the computer Central Processing Unit (CPU). Each instruction performs a specific operation on a unit of data contained in CPU register, or memory.

In this post, we target the Sega SC-3000 hardware: an 8-bit home computer based on the Z80 chip.

Typically, machine code instructions are stored in memory and invoked from a BASIC driver program. Once invoked, machine code instructions are then executed one by one, similar to BASIC commands.

However, unlike BASIC, machine code will not automatically stop when it reaches the end of program. Machine code must execute the RET instruction to return to BASIC; very similar to RETURN in BASIC.

Opcodes
Each machine code instruction has a unique numerical code called an operation code, or an Opcode.
In the example above, the opcode for the RET instruction is 201 or &HC9 in hexadecimal.

Mnemonics
For completeness, RET is the called the Mnemonic; that is, the symbolic name for the instruction.

Dissection
Therefore, let's dissect the short code sample from above:
10 POKE &HF000, &HC9
20 CALL &HF000
RUN
  • Store opcode &HC9 into memory address &HF000
  • Invoke machine code routine at origin &HF000
  • Execute machine code instructions (only one)
  • Execute RET instruction: i.e. return to BASIC
Documentation
Check out here for the Z80 instruction set. Check out here for full (undocumented) Z80 Opcode list.
Many more tutorials can be found in magazine scans from Sega Survivors web site and SMS Power.

Books: the authoritative Programming the Z80 by Rodney Zaks and Mastering Machine Code (Z80).

Debugging
Before progressing with thorough machine code example, let's setup our environment for debugging: Make the change to the mekaw.cfg file: find debug_mode = 0 and replace with debug_mode = 1.

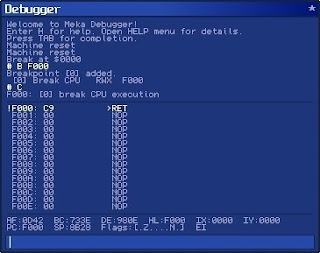
Launch Sega BASIC Level 3 ROM as before; there should now be additional DEBUG menu available. Choose: Debug menu, Enabled. Meka will break at the memory address at current code execution. Type "B F000" to set breakpoint at &HF000 Type "C" to continue Type RUN as before Program now invokes CALL &HF000 as before but this time breaks at breakpoint set above.
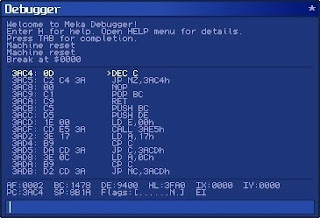
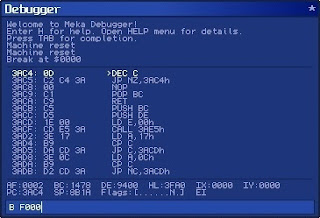
Hit the Enter key to step through the machine code: executes RET which returns to BASIC.

Note: for full list of Debugger commands choose: Help menu, Debugger.
Also, enter Up / Down arrow keys to scroll through command history.

Example
As an example, let's write the main loop of a simple "Shoot 'em up" style game, similar to the previous post, that simply moves a target sprite around the screen based on user input; preferably the joystick.

However, write the main loop in machine code for increased speed + performance, rather than BASIC.

Sample
The following code sample is reminiscent of the tutorial Joystick Operation using Machine Code Routine. Follow the tutorial closely to better understand what machine code instructions are required and why.

Type in the following program. Important: ensure you save state before RUN: Main menu, Save State.
10 REM SEGA MACHINE CODE PROGRAMMING
20 GOSUB 300:GOSUB 400
40 SZ=16:MAG1
60 MR=256-SZ:MD=192-SZ
70 TX=MR/2:TY=MD/2
80 SCREEN 2,2:CLS
90 COLOR,1,(0,0)-(255,191),1
100 REM MAIN LOOP
110 SPRITE 0,(TX,TY),0,9
120 CALL &HF000
130 STOP
300 RESTORE 350
310 FOR S=0 TO 3:READ S$:PATTERN S#S,S$:NEXT S
320 RETURN
350 DATA 000039202100012A, 2A01002120390000
360 DATA 00009C0484008054, 54800084049C0000
400 RESTORE 450
410 FOR X=&HF000 TO &HF036
420 READ A$:A=VAL(“&H”+A$):POKE X,A
430 NEXT X
440 RETURN
450 DATA 3E,9B,D3,DF,DB,DC,FE,FF,28,FA,FE,F7,20,10,21,01
460 DATA 3B,CD,32,2C,DB,BE,3C,CD,44,2C,D3,BE,18,0E,21,01
470 DATA 3B,CD,32,2C,DB,BE,3D,CD,44,2C,D3,BE,01,00,03,0B
480 DATA 3E,00,B8,20,FA,18,CD
RUN
The graphics screen clears black and positions a red target sprite. Use the joystick to move target sprite.
Note: de-activate the keyboard to ensure the joystick takes precedence: Inputs menu, Sega Keyboard.

In this example, moving joystick right moves target sprite right; moving any other direction moves left.
Important: if joystick not configured then try these keys: "J" = left, "M" = right, "7" = up, "U" = down. Note: the machine code here actually does not RET to BASIC; press the "Scroll lock" key to soft reset.
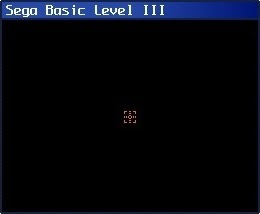
As you can see, the machine code version of the program is much smoother than its BASIC counterpart. In fact, machine code is so fast that a delay is required: without it, the sprite would simply flash across!

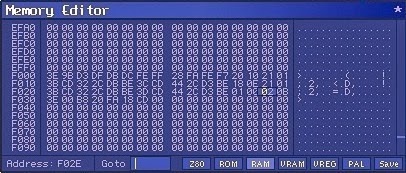
Experiment with different delay speeds at runtime by manipulating memory directly:
Note: original time delay is 0300 but is stored in memory as 00 03 (Little-endian).
  • Tools menu
  • Memory Editor
  • Click RAM button
  • Type F02E
  • Enter "02" (faster)
  • Enter "04" (slower)
For completeness, here is the disassembled machine code from the tutorial in its entirety:
--------------------------------------------------
Z80    DISASSEMBLER     LISTING
Line   Addr Opcodes     Label   Instruction
--------------------------------------------------
0000   0000             .ORG    0F000H
0001   F000 3E 9B       START:  LD A,09BH
0002   F002 D3 DF               OUT (0DFH),A
0003   F004 DB DC       CHECK:  IN A,(0DCH)
0004   F006 FE FF               CP 0FFH  ; any movement?
0005   F008 28 FA               JR Z,CHECK
0006   F00A FE F7       RIGHT:  CP 0F7H  ; move right?
0007   F00C 20 10               JR NZ,OTHER
0008   F00E 21 01 3B            LD HL,03B01H
0009   F011 CD 32 2C            CALL 02C32H 
0010   F014 DB BE               IN A,(0BEH)
0011   F016 3C                  INC A
0012   F017 CD 44 2C            CALL 02C44H
0013   F01A D3 BE               OUT (0BEH),A
0014   F01C 18 0E               JR DELAY
0015   F01E 21 01 3B    OTHER:  LD HL,03B01H
0016   F021 CD 32 2C            CALL 02C32H
0017   F024 DB BE               IN A,(0BEH)
0018   F026 3D                  DEC A
0019   F027 CD 44 2C            CALL 02C44H
0020   F02A D3 BE               OUT (0BEH),A
0021   F02C 01 00 03    DELAY:  LD BC,0300H
0022   F02F 0B          LOOP:   DEC BC
0023   F030 3E 00               LD A,00H
0024   F032 B8                  CP B
0025   F033 20 FA               JR NZ,LOOP
0026   F035 18 CD               JR CHECK
Important: machine code programs will crash if there are errors; they are not as forgiving as BASIC. Therefore, ensure you save state before you RUN machine code programs: Main menu, Save State.

Summary
In this post, machine code was introduced to target Sega hardware for increased speed + performance.

However, a machine code program suffers from the disadvantage that it is tedious and cumbersome to manually translate each mnemonic to the corresponding opcode plus calculate all jump relative offsets.

This can be resolved by using assembly language and an assembler to generate machine code routines. This will be the topic in the next post.